 ----- The N2DVM BLOG of projects and what not. -----
What am I working on today? Wheels 128 Master disks is what I'm working on. I did manage to get a copy of a 3.5 DS DD 1581 disk imaged so that when it's written back to a disk, it is ALSO a Master disk. A Master disk is a disk that can be used to create more master disks, either a 3.5 DS DD or a 5.25 disk. BUT it needs to be done under Linux to work. I used the linux command "dd" to make the disk. I was able to figure out where the Encrypted names are on the disk. What I did was collect a bunch of disk images of Wheels from the internet, dump them to disks, load them up and find the Names and VIN numbers, then figure out what the Plain text letters were then look at the encrypted code and figure out what the hex codes were that would need to be edited. Below is the table :
| Small | Caps | #'s | a = 3d | 7D | - = a5 | b = 3b | 7B | 0 = 9f | c = 39 | 79 | 1 = 9d | d = 37 | 77 | 2 = 9b | e = 35 | 75 | 3 = 99 | f = 33 | 73 | 4 = 97 | g = 31 | 71 | 5 = 95 | h = 2f | 6f | 6 = 93 | i = 2d | 6d | 7 = 91 | j = 2b | 6b | 8 = 8f | k = 29 | 69 | 9 = 8d | l = 27 | 67 | m = 25 | 65 | n = 23 | 63 | o = 21 | 61 | p = 1f | 5f | q = 1d | 5d | r = 1b | 5b | s = 19 | 59 | t = 17 | 57 | u = 15 | 55 | v = 13 | 53 | w = 11 | 51 | x = 09 | 4f | y = 07 | 4d | z = 05 | 4b |

What you want to search for IN HEX is "516fa5" that is the WH- in the VIN number, EXA: WH-1001B in my example. The First and Last names can be up to 16 characters each. The "FF" is used to fill the remaining characters that are not needed. The first Name goes from Hex 0006E30F to 0006E31F and the last name goes from 0006E320 to 0006E32F. The VIN Number goes from 0006E331 to 0006E338. This example was with the D81 file loaded up in Winhex and NOT from the 3.5 Disk. The info can be found in the 128SYSTEM2 file if you want to edit on the Commodore instead. On a 3.5 disk, the SAME Encrypted info is located on track 81 of the disk, BOTH Encrypted sections need to be changed. I need to retry this on a MASTER DISK, I may have messed it up BUT after I changed the Name/VIN, t he disk was no longer a "Master Disk". This is one of the things I'm trying to figure out.
This is a work in progress so some things can and will be changed. I'm not a software guy so it's taking me way longer that I want it to BUT I'm going to TRY and figure it out one way or another.
(16:48 12/11/2011) : Changing the Name/VIN in the 2 places as well as the Plain Text on the disk makes the disk "Not a Master Disk" :( Back to the drawing board on that. The Disk can still be used as a system disk and works fine though.
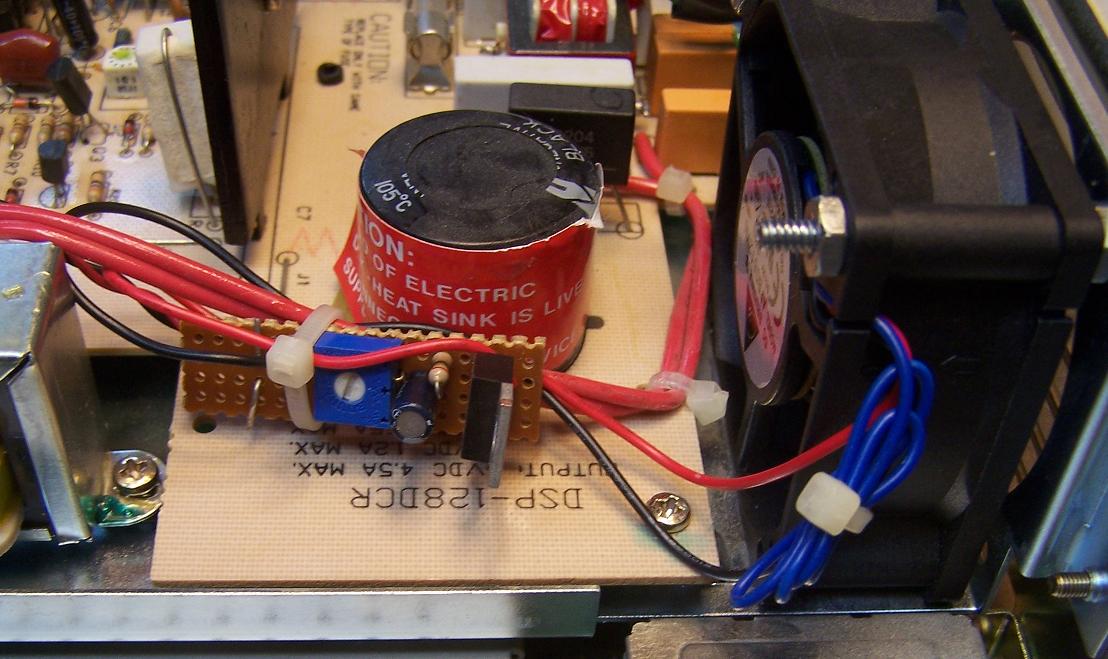
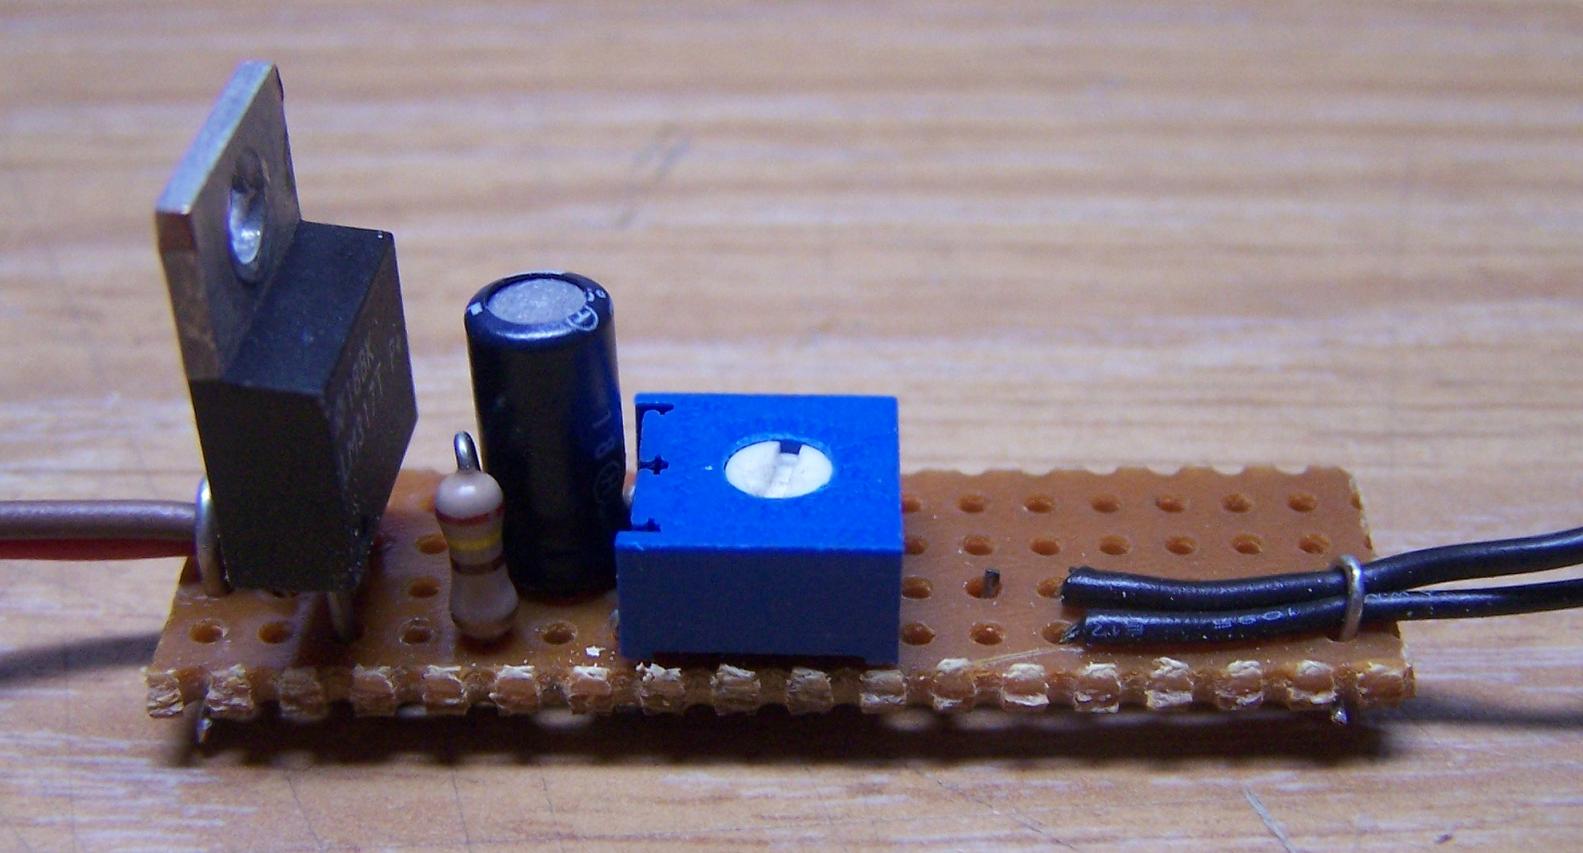
I built and tested the LM317 Regulator circuit a week or so ago, works perfect. I finally got around to ripping the 128DCR apart again to install it. After I changed the wires around to the way I liked it, I made sure nothing from the small PCB was touching anything on the power supply and plugged it in, no smoke and thats a good thing. I adjusted the 5k pot to the speed I wanted the fan to run, just fast enough to move air thru the case is all I really wanted. I unplugged the Power cord and let the PSU caps discharge and then reassembled the PSU PCB back into the mounting plate. There was a set of nice heavy wires that ran to the 9 VAC transformer, Perfect to zip tie my small PCB to, right in front of the fan so the LM317 would not run hot. PERFECT I say...
NOTE : I STILL Have some of my C64 and 64C Kernel ROM adapters for-sale, $20 each PLUS Shipping. Email me if you would like to purchase any.
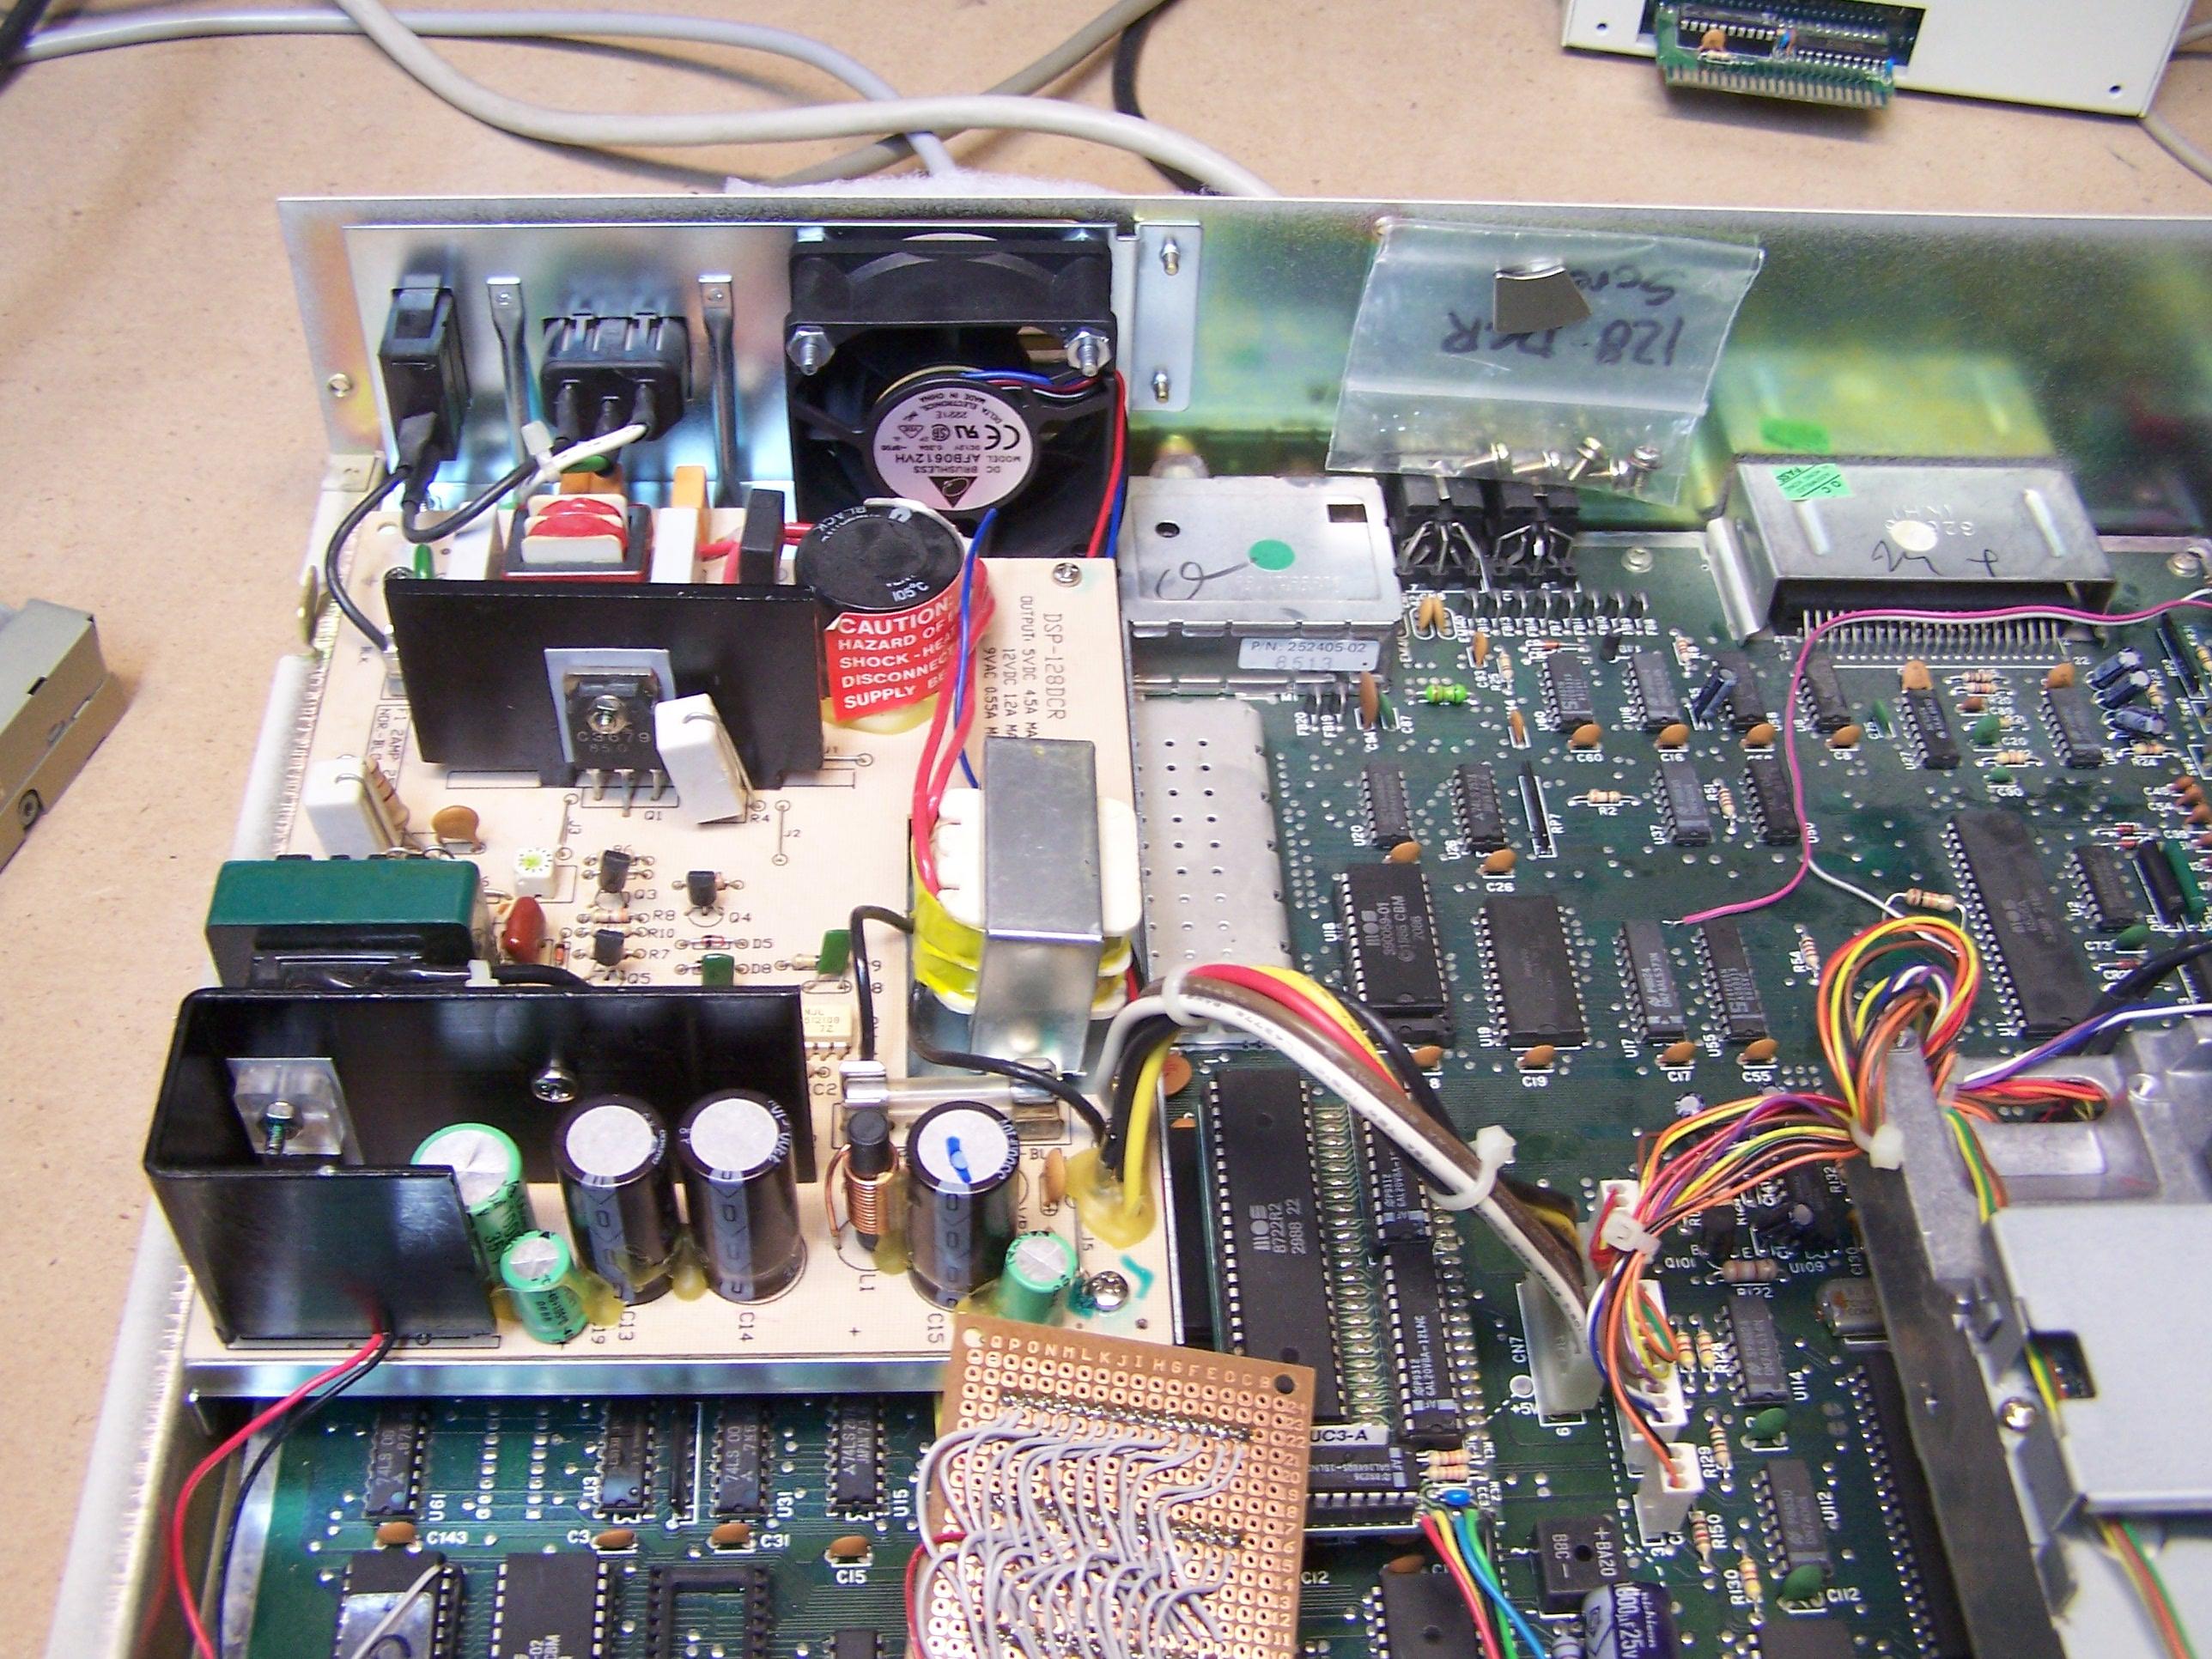
I got tired of looking at all the crap I had in my "Dungeon" here so I started cleaning up. One of the drawers in my roll around tool box is where I store all my electronic bits pieces and parts. I had 6 various size computer fans in the drawer. One of the smaller size fans looked like it would fit in the 128DCR on the power supply, I pulled the cover and set the fan in the designed spot, fit PERFECT. I looked and the power supply in the 128DCR to see how it was mounted. Two screws on the side, two on the back and one on the power supply next to the 9 Volt AC transformer. The wire to the front LED is soldered to the PSU PCB so I had to disassemble the front bezel to remove the power LED so the power supply could be removed. After removing the power supply I moved it over to my desk so I could find the 12 volt DC wire (It was the Yellow wire)thats connected to the main PCB. I cut the plug from the fan, three wires, (Red, Black and Blue) I didn't need the blue one so I didn't strip the insulation off that wire. I tinned the red and black wire and soldered them on the bottom side of the power supply and mounted the fan with two long 6-32 x 1.25 inch screw in the back of the power supply. After I was sure everything was OK, I plugged it in. Fan powered up and NO SMOKE, Just how I like it. I have this filter material that I am going to cover the back of the computer with to keep the dust from sucking into the computer. I have the fan blowing IN so that it doesn't suck dust into every crack thats in the case. Later on I want to put a variable voltage regulator on the circuit so I can adjust the fan speed by the applied voltage. Something for later on..
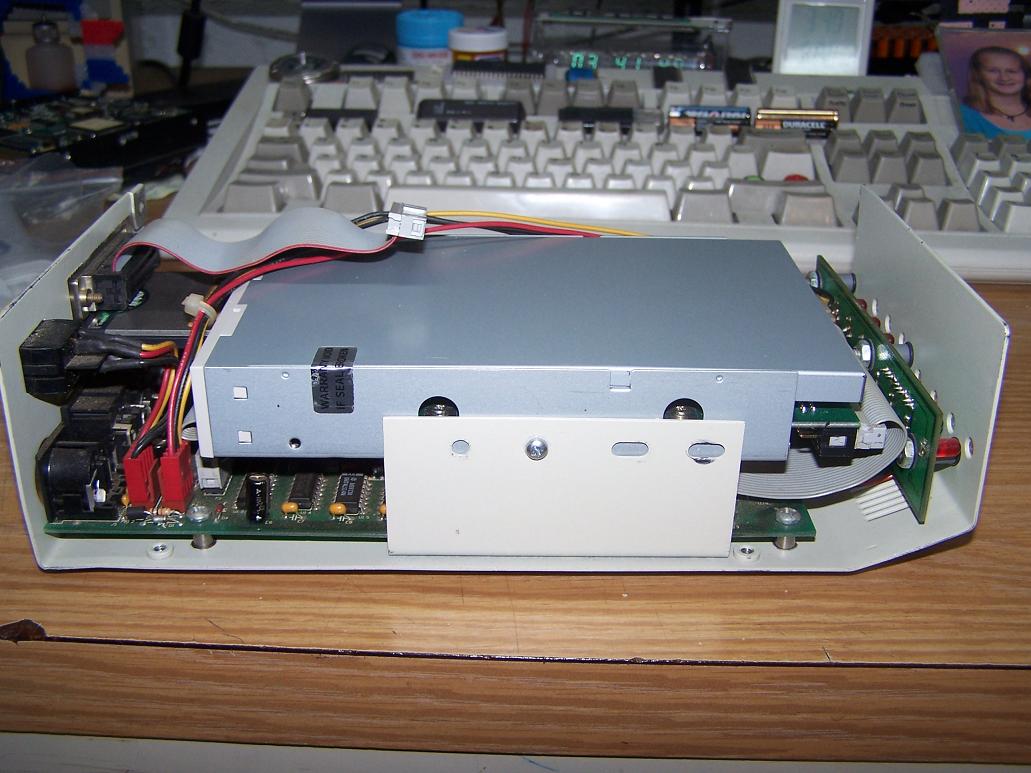
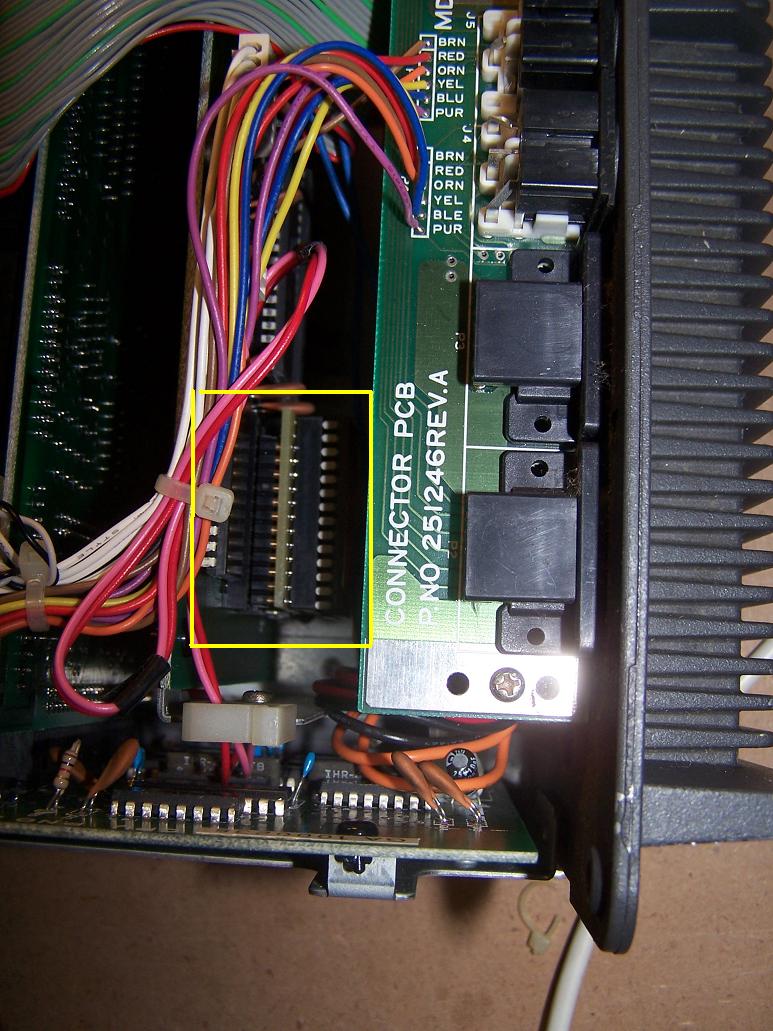
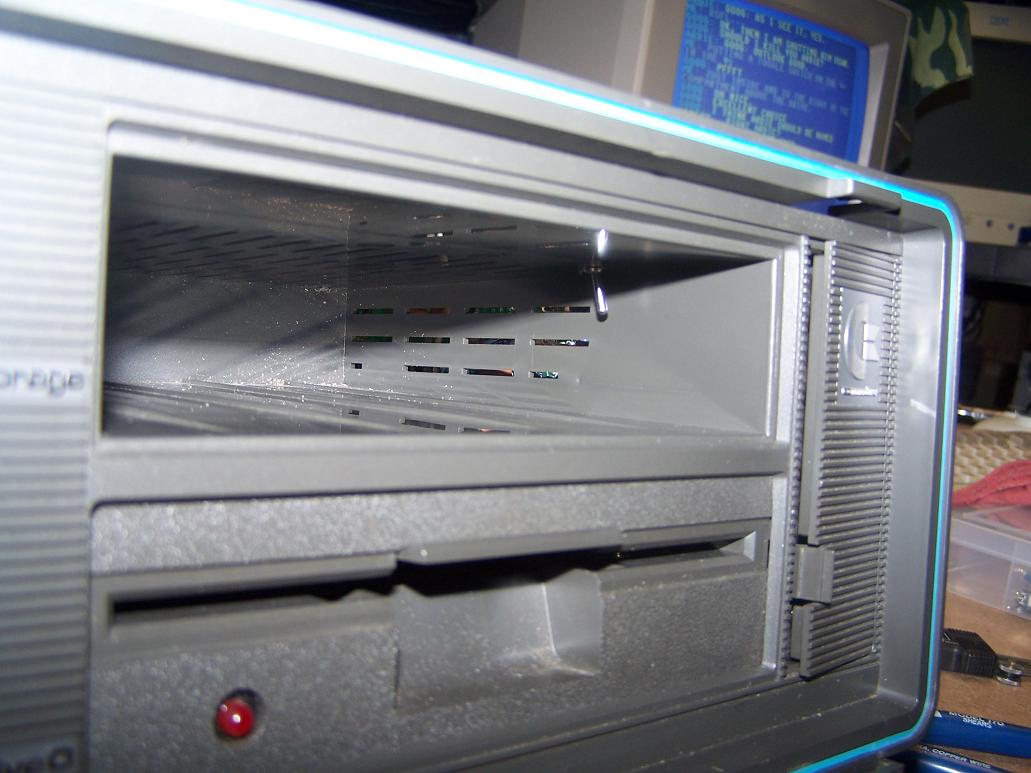
Tonight I decided to finally put the SCSI Multicard reader in my CMD HD enclosure that I purchased from the MechWare store awhile back. I pulled the drive apart and removed the 120mb HD and set it aside for safe keeping. While I had the drive open, I seen that it had the v2.80 H ROM in it so no upgrading needed to be done there. The card reader will need to be setup as ID0 and the PCMCIA Slot is the FIRST slot (LUN 0) and thats the one I used. At the moment, I have NOT tried running more that just the CF card. I'll do some more testing and update the BLOG with the information at a later time. The CMD HD Setup software looks to this LUN0 first so it MUST be used. I had to unplug the external SCSI cable from the PCB so the card reader would fit in the enclosure as seen in the pictures below. With the CF to PCMCIA Adapter plugged in it makes the whole setup a tad bit LONG. I also had to fold the SCSI cable over so that it wouldn't rub on the screws that hold the LED/Button PCB onto the front of the case. I have a thin plastic strip I'm going to put between the cable and the screws just to be safe. There must have been some type of bracket to hold the original HD in the unit, mine didn't have it so I used a single screw to hold the cardreader to the side plate as also seen in the pictures. After I got the hardware installed, I used the program "create sys" from the CMD HD Utilities disk to setup the CF card for use. Then I ran the program "hd-tools.64" to create the partitions. The Memory card I'm using is a Kingston 4GB card.
Vanessa, thanks for the info on what to do with formatting the CF card and getting it working. :) Without your help I would have pulled all my hair out trying to figure it out. Being NEW to the HD I have no idea what to do or how it's done.


: I changed the Link colors, the Blue/Purple was a bit hard on the eyeballs, sorry about that folks. :)
Awhile back I had an old Thompson RGB monitor that a filter CAP or what ever it was on the PCB when up in smoke and stunk my room up for 4 hours. I took it apart and figured out what it was, I was gonna junk it but decided to stuff it in the garage for now. I had to clean the garage a bit today and the monitor needed to be moved, I decided to dig back into it and see if I could get it working again. I had taken apart an old Power supply or something awhile back and found a part that I thought might work in this one. It sat on my bench for 2 months or so, well today it got put in the monitor and I'm happy to report this "Thompson CM 36512 VI" is now working again. It's an RGB monitor BTW. To think I almost tossed it in the trash... Phew, that was a close one.
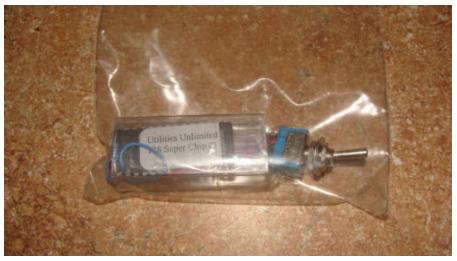
I purchased an EPROM Chip from a guy by the name of "perabyte09" I guess he was "WorldLam" before. It a 128 EXTRA ROM Socket utility ROM, it's called "Utilities Unlimited 128 Super Chip C". I don't have any information on it BUT thanks to Zimmers I found a little info to a previous ROM that seemed to work with this one. If anyone has more info on this, PLEASE send it to me. Click on the "Android" at the TOP of this page to send email.
Been playing with the CMD HD here and there, I setup a 1581 partition on it so I can access it from GEOS 128 v2.0. Got that working BUT I would rather have GEOS or WHEELS Boot from the HD instead of a disk. I don't even know if that can be done or not. I'm still going thru the HD Manual and learning about the drive. What I'll do is do a step by step on how it's done IF I can get it to work right here in the BLOG. If you can help with any information, click on the "Android" at the top of the page and send me an email.
WANTED: A Master Disk of Wheels v4.2 or v4.4. You can tell it's a MASTER DISK if you can create another MASTER Disk from it. All the "MASTER Disks" I have found are NOT Master disks. Send me an email if you have a copy I can grab. I would BUY IT if I could but we all know it can't be purchased any longer. I'm NOT ABOUT to send Maurice Randall any money for anything so don't even suggest it. :)
Wooot! My CMD HD Arrived today, purchased it from a gent it France, Goes by the name "Sam64H" on Lemon64. I didn't have a power supply for it. I was going to use a 1581 PSU but it was rated at only 1 AMP on the +5 volt side, it would have worked BUT it's not really enough power to run the HD for a long time without killing the PSU and I didn't want to kill the only one I have. It also gets used on the V1 Ramlink I have.
I have a bunch of PC Power supplies here, when I rip a system apart I keep all the power supplies for either parts or use for something. The next problem was I needed a power cable for the HD. Same pin out as the 1541-II and the 1581. Al Anger gave me a bunch of bits pieces and parts, I dug thru the box and did find a cable in there that was nice and long, about 5 foot or so. I drew up a little diagram of the pin outs, then checked to see what wire went to what pin on the plug. With that figured out, I ripped the PC PSU apart and removed all the power wires and then soldered the wires from the HD cable to the proper spots on the PSU PCB, It was nice and easy, the board had silkscreen on it what each the voltages marked for each set of wires. I reassembled the PSU and plugged it in, NO SMOKE which is a good thing of course. I used a 1541-II for TESTING just incase I screwed something up.. a 1541-II is cheaper to replace that a CMD HD is. Powered the PSU up, the drive powered up, switched on the 64 and loaded a program from the drive, BINGO!! Works perfect.... and so does the CMD HD. I have the CMD Power Trio, SCPU, Ramlink and a the HD w/parallel cable. I'm living large now. I'm outta here, time to play with my new toys...
I got a C64 and a 1541 for free at ECCC, It was on the free table and DemongerX had grabbed it and later gave it to me. When I got home I decided to check them out, the C64 doesn't work, Probably a bad PLA. I'll get to it when I have time as I already have a bunch of C64's that work so why hurry. The 1541, the LED Blinks a slow steady pace, doesn't seem to stop so I can't figure it out yet. I replaced all the large IC's with know tested good working ones, no deal. I tried a couple of the logice IC's that I was told to check, of course they wern't in sockets so I can had unsolder the IC and install a socket before I could test. No luck. I put it back in the box and I'll get to it sometime later on. Only reason for wanting to fix it is because the drive looks damn near Brand new not a mark on it. Even the rubber feet on the bottom are perfect. Project for another day...
I got out the $60 SX64 I got at ECCC tonight. I had already put JiffyDOS on the main system board but not the 1541 controller board. I decided I wanted to do that tonight and be done with it. I opened it up, jbev and I took it apart at ECCC so I already knew what I needed to do to get it apart. I looked it over for a few minutes deciding how I wanted to go about pulling the controller board and not screwing any of it up. With a little bit of effort, I managed to get the main drive connector disconnected from the controller board, that was a real pain but at least I know it's snug and getting a good connection. All the rest of the connectors came off easily since most were only 8 or fewer wires. When I pulled out the controller board there was a 28 pin socket with the 24 pin ROM chip in it so I knew which chip I had to remove. I forgot to take pictures of it... ahh well. I did take a few of where the adapter was located and the switch I put in for the C64 JiffyDOS ROM. I purchased the binary for the C64 ROM at ECCC from Jim Brain. I put a switch on the 64 ROM so I could go between JiffyDOS and the Stock Kernel if I wanted to.

OH What a blast I had at ECCC 2011, Jbev and I left around 9:30AM or so and arrived in Illinois around 10:30PM that night, MAN what a long ride, 900miles.. Met a bunch of the guys from IRC there, Mhoney, Dragos, ShadowM, DLH, Jim Brain, Goog (of Commodoreserver.com), Dracosilv, AgentFriday, DemongerX, Joe P Etc... Was great to finally meet every one in person. When we went up to our room the first time, we were met by Dracosilv on his way to the lobby, The lobby was empty when we arrived. He informed us that every one was headed to the lobby...my ass was ready for bed at the point though. Jebv and I got the laptops out and connected to the internet to make sure it was gonna be ok, we gotta have our Internets ya know... After about 20 minutes of getting settled in we headed back down to the lobby. When we got back down there, there was like 20 people down there by then... After some introductions and what not, the BSing began. Lots of great talk and info was to be had. We stayed down in the lobby till almost 5AM.
The next morning we dragged ourselves out of bed at around 9AM. By the time we were ready to go, it was a little past ten. LATE by Expo standards. The night before, we left most every thing in the car, no sence in dragging it up to the room and then back down and over to the expo center. Once we found a cart to move every thing in one trip, we were off to the expo room. When we get there, there was not a table free except the one that was in the middle of the room, no power.. :( Thats what we get for being late. Thanks to Jason aka DemongerX, he cleared off his table and let Jbev and I setup our systems. I brought a 1902 Monitor, C64, 64C (Both my test bench systems) and a 1541 and 1571 drive. Jbev had an LCD monitor, a PAL 64C a 5 1/4 floppy drive, I forget the model and a VEG Video device to hook the 64C to the LCD monitor. Looked nice now I need to get me one of those devices. After we got setup we started chatting it up with the guys that were directly around us, DemongerX, Dragos, DLH and Joe P (Super Snapshot Joe).
Around 5pm or so, Goog, AgentFriday and Rik asked Jbev and I if we wanted to go eat, it turns out that there was like 20 people going to this "Dappers" Restaurant for dinner, a nice italian food joint, the food was really good and not to overly expensive. We did the same the next night also. When we got back, we went and hung out in the expo center for a few more hours till they kicked us out, back to the lobby in the motel for more BSing and general geek talk. There had to be 40 or 50 people in there by then. I managed to get a spot at the large desk and an open outlet for my laptop. I stayed in the lobby till 10PM on Sunday night with every one, had to get up at 5AM and be back on the road by 6AM. 900 miles is a long ride. Jbev let me drive a few hundred miles so it wasn't to bad. I had a great time and if I can, I --WILL-- be going again next year. Some Pic links I posted on Lemon64. As soon as I get a moment, I'll get my pics up online also. Thanks to every one that made my first ECCC a great time. What did I buy while I was there you ask? Well, I bough a 1541 and a 1541C from DemongerX for $5 each, I purchased a 1571 in the box from Jim Peters for $20, a 1571 from one of the guys in the VCF Room for $10 along with the Jim Butterfield Machine Language book for $20, I bought a DEAD SX64 for $60 that Jbev and I got working, dead PLA. I took the one out of my C64 and tried it, the SX fired right up, the thing isn't perfect but it WORKS perfect. I bought a Comet64 from Goog for $49. Grabbed an Eypx 500XJ Joystick from Joe P for $7.50. I was hoping to maybe purchase a CMD HD there but no one had one for sale. :( . I could have wrote a bunch more but it would be boring details. Figured I would hit the highlights instead.
All packed and ready for ECCC. I'll be leaving the house shortly for a 12+ hour ride with Jbevren. I may post some pics from there on here. Not sure at this point how things works as I've never been to ECCC before...
I'm all excited, ECCC is this weekend!!!! First time going to this show. I'll be riding Shotgun with Jbevren. One of the great things will also be the Vintage Computer Festival going on in the SAME building. I love old computers.
I've been working on my Kernel ROM adapters, Building 15 each of the C64 and 64C versions. I'll program them all with the STOCK/JiffyDOS/AutoBoot ROMS. This way no screwing around at the show. More time for other things. I STILL sell them from home, I have about 70 more C64 Boards and about 34 more 64C boards. If your interested in one, send me an email and we can work the details out.
I have the Dell PowerEdge 1750 WEB Server all ready to put online in place of the old PC that the servers are currently running on. ONE NOTE: I will be moving the FTP server over to WEB only access. To many people are trying to download the ENTIRE SITE. It's over 50GB and I run the sites from my HOME. <
It's OFFICIAL!!! I will be at ECCC with Jbev \o/ !!! Been playing with a Dell PowerEdge 1750 Dual Processor (3.20Ghz Xeons) Server computer. I know, WHAT'S this have to do with Commodore, Well I'll tell you, It will be the new Web / FTP server computer for the www.n2dvm.com website when I get it done. I picked up the server from Sloopy on IRC. I got a 9GB HD with it but thats not enough to run it the way I want. Another guy on IRC by the Handle of Info-Seeker gave me a 73GB HD for it. Thanks again I.S. I just installed Fedora Core 14 on that HD. I have a couple 143GB HDs coming for it also. Once they get here I'll install one of them and the external USB 500GB HD I bought from Walmart the other day as the FTP File storage device. I can't wait to get this thing up and running. I never owned a Server computer before.
I'll admit it, I've been a little lazy with creating things for the C=. I ran out of ideas at the moment. Brain dead... I'll think of something to do sooner or later. I started thinking about getting a CMD HD to play with. I want a nice clean one to go with my nice and clean SCPU and Ramlink that was purchased from Al Anger. :)
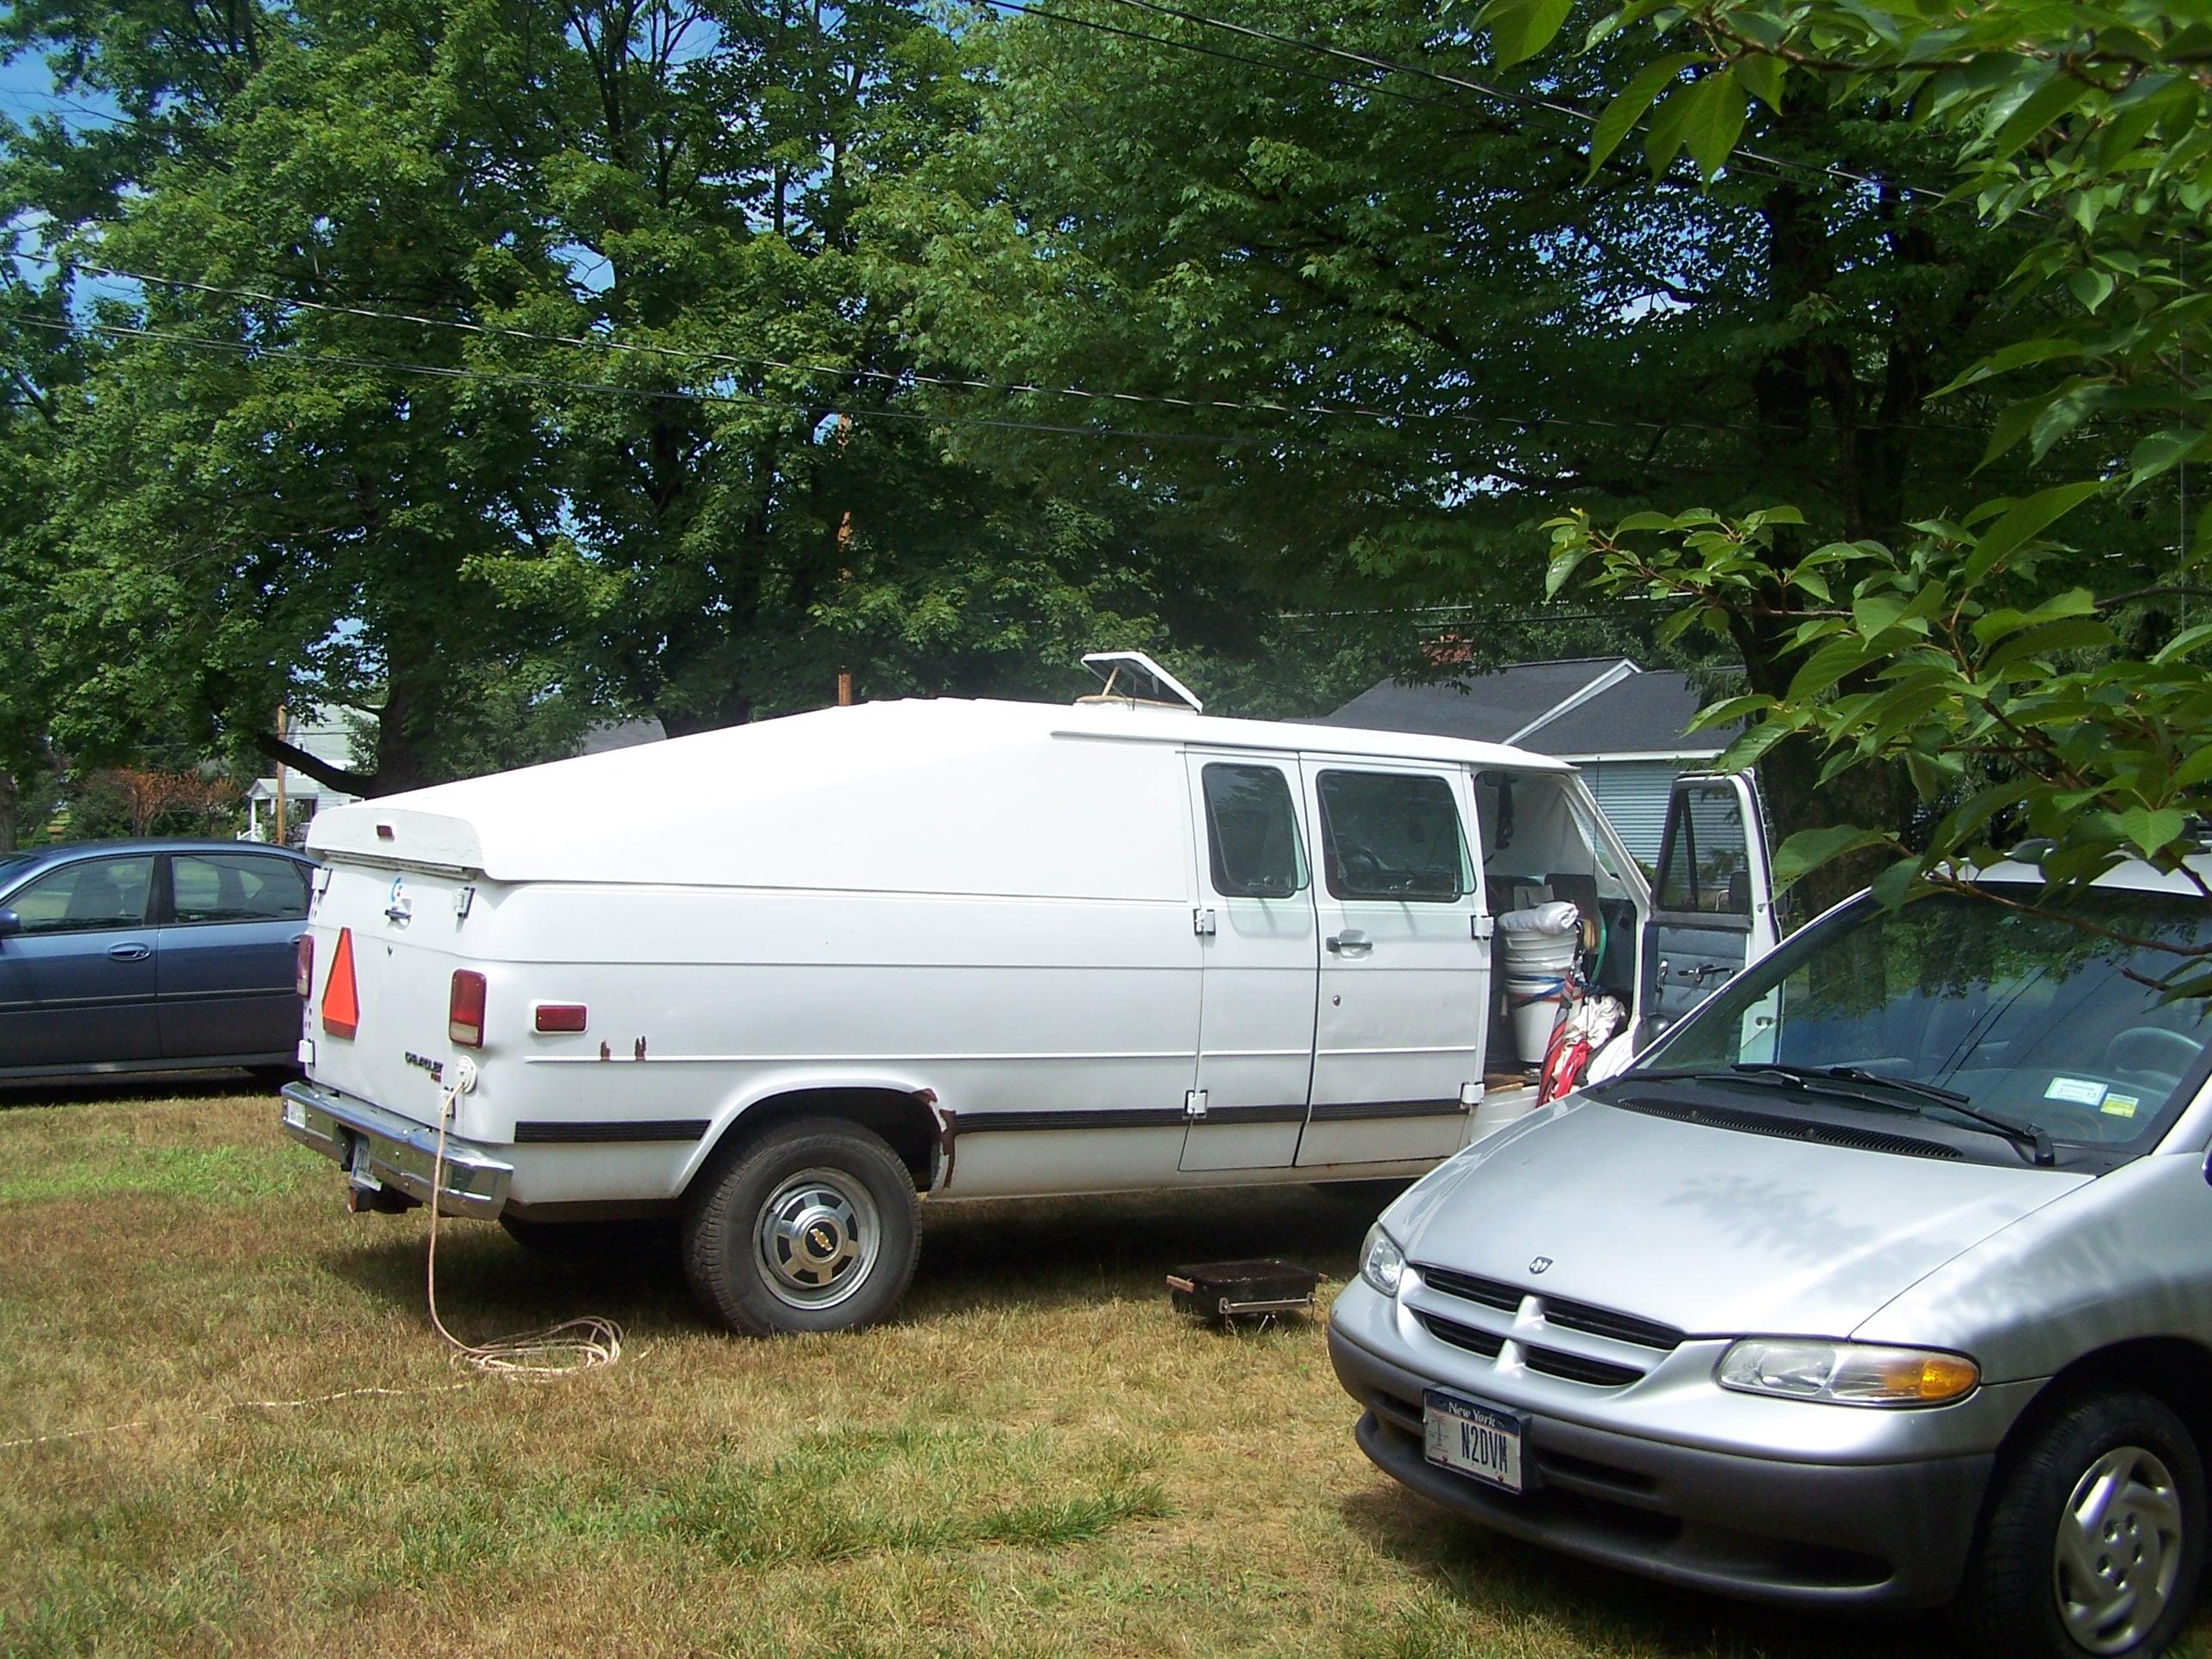
Al Anger posted a message in the IRC channel stating that he was in Fulton, NY at the Local Walmart. I jumped on the Harley and rode over there. Only a couple miles from my house so it didn't take long. I knew what Als van looked like so it didn't take me long to find him. After shaking the mans hand and welcoming him to my home town we set off back to my place. Al was gonna stay a few days and then head over to Jbevrens place in Eastern, NY. Sure was nice to finally meet the man who made my dream of having a super CPU a reality. I wish I would have been on vacation this week. I had vacation Last week and really couldn't afford to take any days off. Al, Thanks for stopping by. I really enjoyed meeting with you face to face and talking like we did. Stop by anytime you in my neck of the woods. Your always welcome at our home. Next time I'll have something to keep you busy while your here. I wasn't prepared this time.

After playing with the CMD RAMDrive again tonight and not getting anywhere I decided to play with the 1541U-II that has been on the shelf for the most part since I got it a few months back. First thing I wanted to do was get the onboard REU Working. I wanted to try that "BluREU_Crest" crest Demo out. The demo only runs from a 16MB REU. This can be setup on the 1541U-II. Download and extract the Demo files to the ROOT of the SD card on your PC (I have not played with the USB on the 1541U at this time) How you ask, I'll explain how. With the computer turned on press the middle button on the cartridge. the SDcard screen will come up. Now press F2 to get to the Setup menu, a menu will pop up, cursor down to "C64 and cartridge settings" and press enter. Cursor down to "RAM Expansion Unit" Press enter and enable it. Now cursor down to "REU Size" and press Enter, select the 16mb option. Now to exit the menu press "Run/Stop" this will bring you back to the SDcard menu. Press enter or press the left/right cursor key. Scroll down to the file called "blu.reu" and press enter. A menu will come up now select "Load into REU". After it's done loading it will show a message say that it loaded the file. The next step is to run the PRG file. Select "BluREU_Crest.prg" and run it, IF everything is done correctly the computer will go back to the 64 startup screen and in a few seconds START the demo. Hope this helps you get the REU working on your 1541U-II.
The next thing I wanted to do was get JiffyDOS working on the 1541U-II. I had no one to ask so I had to figure it out. First thing I did was take my JiffyDos 1541-II binary and copy it to the ROOT of my SDcard and put it back in the 1541U-II cartridge. Like before, press the middle button and then press F2 to get to the setup menu. Cursor down to "1541 Drive A Settings" and press Enter. Be sure the Drive is Enabled. Thats the first selection on the menu. Cursor down to 1541 ROM Select and change that to "Load from file", Now cursor down "1541 ROM File" and enter the name EXACTLY as the file is named. In my case I called it "jd1541-II.rom" You do NOT need anything like a PATH to the file etc as long as the file is in the ROOT of the SDcard. I haven't tried it any other way at the present time. Now press Run/Stop to exit the menu. When your in the menu "1541 Drive A Settings" you can change the default drive number in there as well. At first I was pressing "@" and getting my Plugged in 1541 drive info, in order to access the internal 1541 drives in the 1541U-II, you have to plug in the serial cable to it either from an external floppy driver OR the serial port on the back of the computer. For the moment I unplugged my external drives and just ran the shot IEC cable from the cart to the port on the computer. You can't just access the internal floppy drives thru the expansion port itself. No one told me that! After I figured it out, when I pressed "@" to read the error channel of the internal 1541's, I got the message saying that JD was working. OH YEAH, Sweet success! Gotta love it.
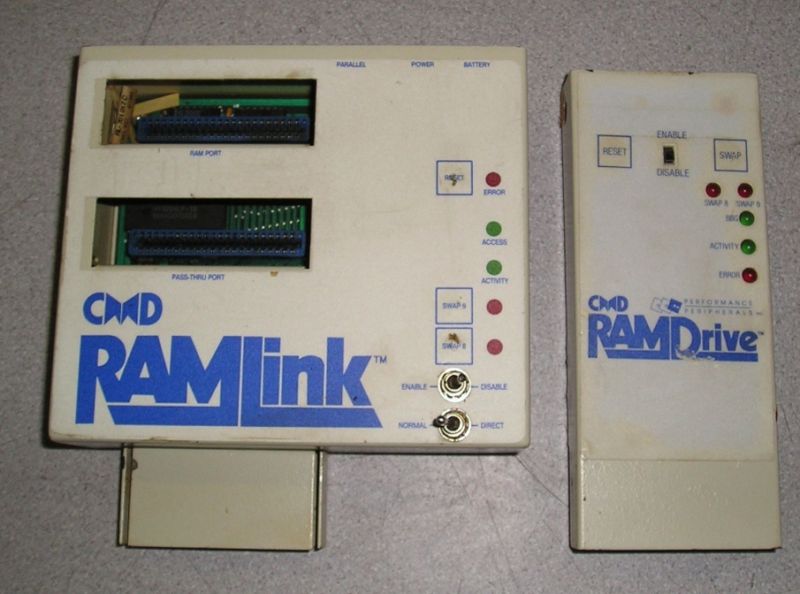
My package from ebay arrived today, a CMD v1 Ramlink and a CMD RAMDrive. I got lucky (so I thought) and got a second chance offer on it as the original winner had to back out. We both bid the same MAX bid but since he bid it before I did he won it. The guy contacted me and asked if I still wanted it because something came up where he couldn't afford it. I said yes and then thought how in the heck am I gonna afford these as I really didn't have the money to buy them but wasn't gonna let them get away from me. This is only the 2nd Ramdrive I have ever seen on ebay. The first thing I did was disassemble the RAMDrive to see what was inside it, that was when I wish I hadn't made this purchase. The nicad batteries were all corroded inside. Wasn't good for sure. I removed the batteries and cleaned the board up the best I could. There are two boards soldered together by pin headers that do not come apart. I have not tried to take it apart any further at this time. I'm just afraid I will destroy it and not have any chance of getting it working. I have a friend that has offered to help me with that part. Click the 1 - 8 links below for the pictures I took of the unit.
The Ramlink is a v1 one model. It only had 4 meg of ram in it until I dug through a box of goodies that I recently received from Al Anger. There was a box of all kinds of odds and ends including 7 - 30 Pin 8 Chip SIMMS. I installed the 4 SIMMS giving the RL 16mb of ram and cut the trace on the RAM Board to allows for more than 4 meg of ram to be used. For the v1 power supply, It uses a 4 pin plug, the same as the 1541-II and 1581 floppy drive. It seems there are two versions of the PSU that was used for those drives. One has a 5 Volt 700ma supply and the other has a 5 Volt 1Amp supply. I read somewhere that using the 700ma supply may cause problems because it doesn't have enough juice to properly power the Ramlink with 16 meg of ram and that you should use the 1Amp version of the PSU. I dug in to my boxes of PSUs and found the one I needed. Sure glad I keep these around as the Ramlink didn't come with anything else, same with the RAMDrive. I'm happy to report that I now have a 2nd Ramlink that seems to be working 100%.
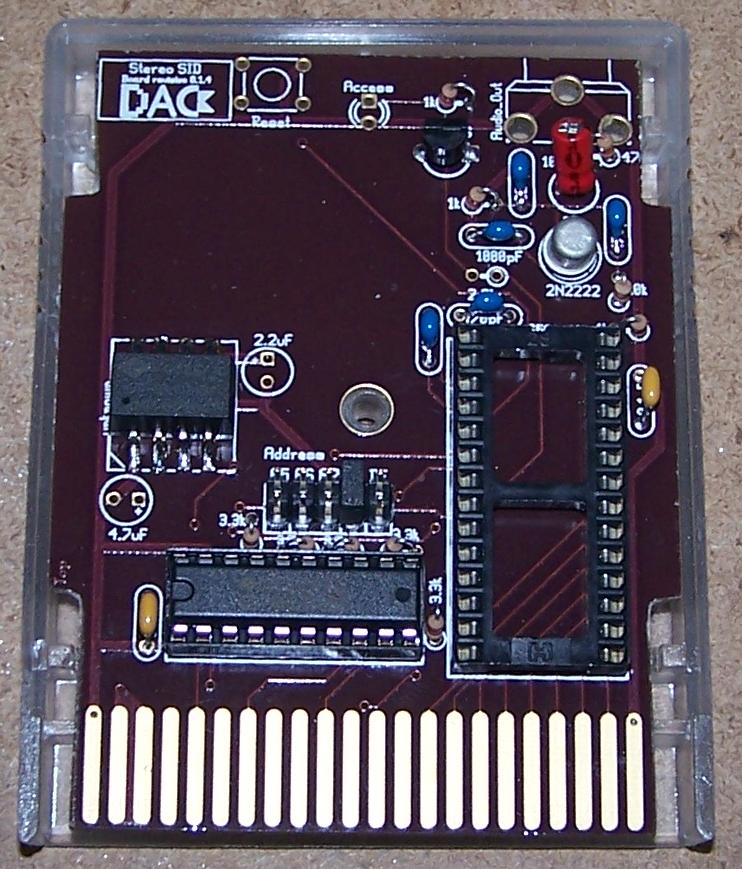
The parts order from Digikey Arived on Saturday for the SID Symphoney II cartridges. Checked the parts order and found that instead of sending me the switches I needed for the Reset buttons, they sent these capacitors instead.. still trying to figure out HOW these capacitors LOOK like the switches I ordered. Here is a picture of the board without the reset button on them. They are all tested WORKING 100%
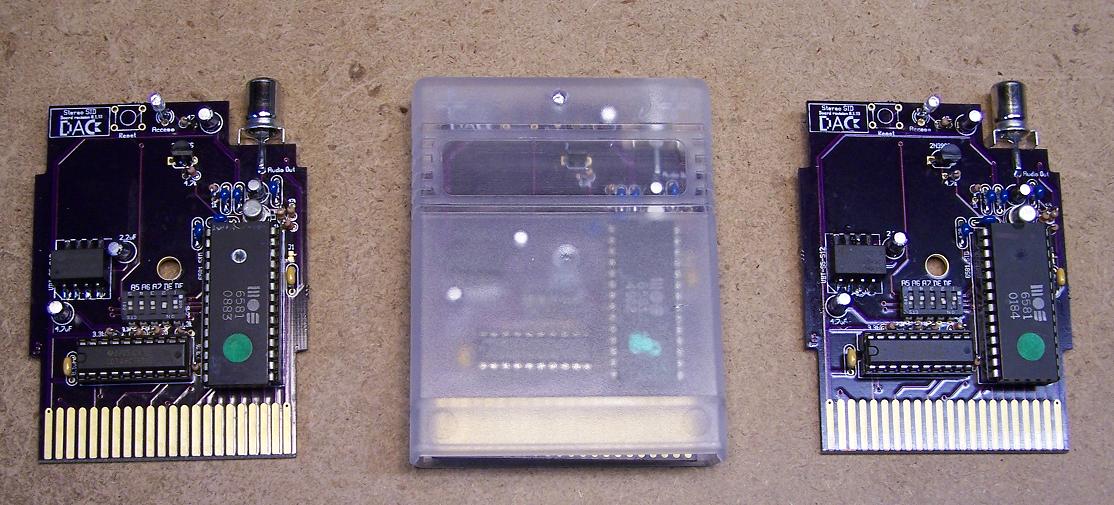
Been a little lazy lately I must admit, Nice sunny weather, Riding the Harley etc... Yesterday 3 PCBs arrived in the mail. They are for the next version of the SID Symphoney II cartridge. I put in a small order for the needed parts from Digikey that I didn't have on hand. Parts should be here in a week or so. Give me something more to play with. I'll post pics of the completed boards.
Was talking about creating D71 disk images in the Newnet #c64friends IRC channel today. To join type "/join #c64friends" then "/nick "NAME". I have never created one myself. Did a search on Lemon64 about it. Found an article about using D64copy. D64copy Help Some info was posted that sure helped. The line is :
d64copy --two-sided --bam-save --transfer=auto --start-track=1 --end-track=70 --drive-type=1571 --retry-count=10 --error-map=on_errors 8 image.d71
I was using a Zoomfloppy and 1571 with the parallel port mod. I'm using opencbm on the Zoomfloppy and this archive from Nate Lawson has the d64copy binary in it.

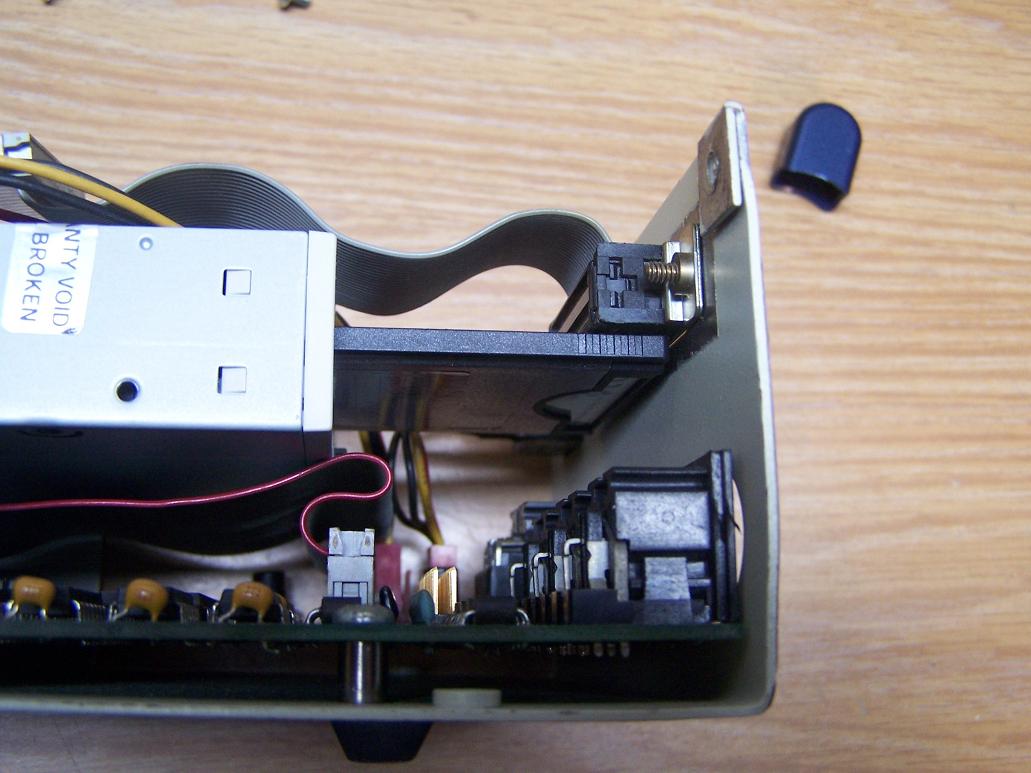
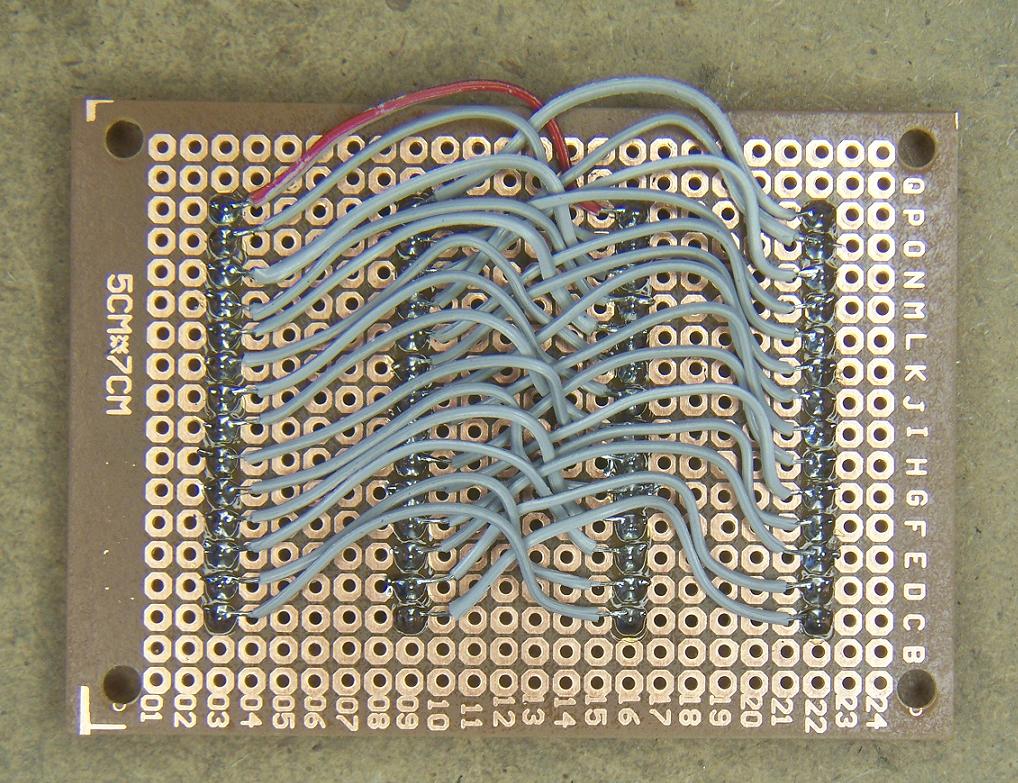
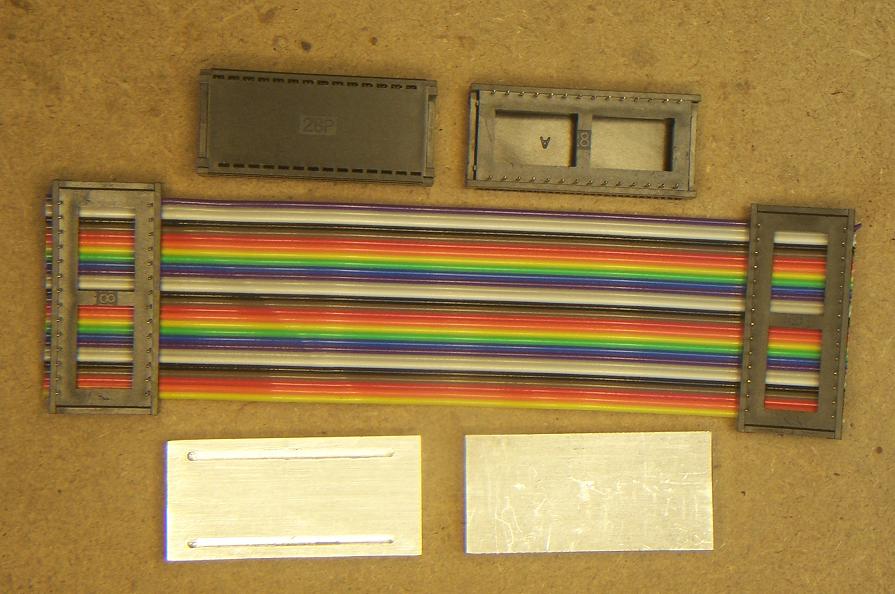
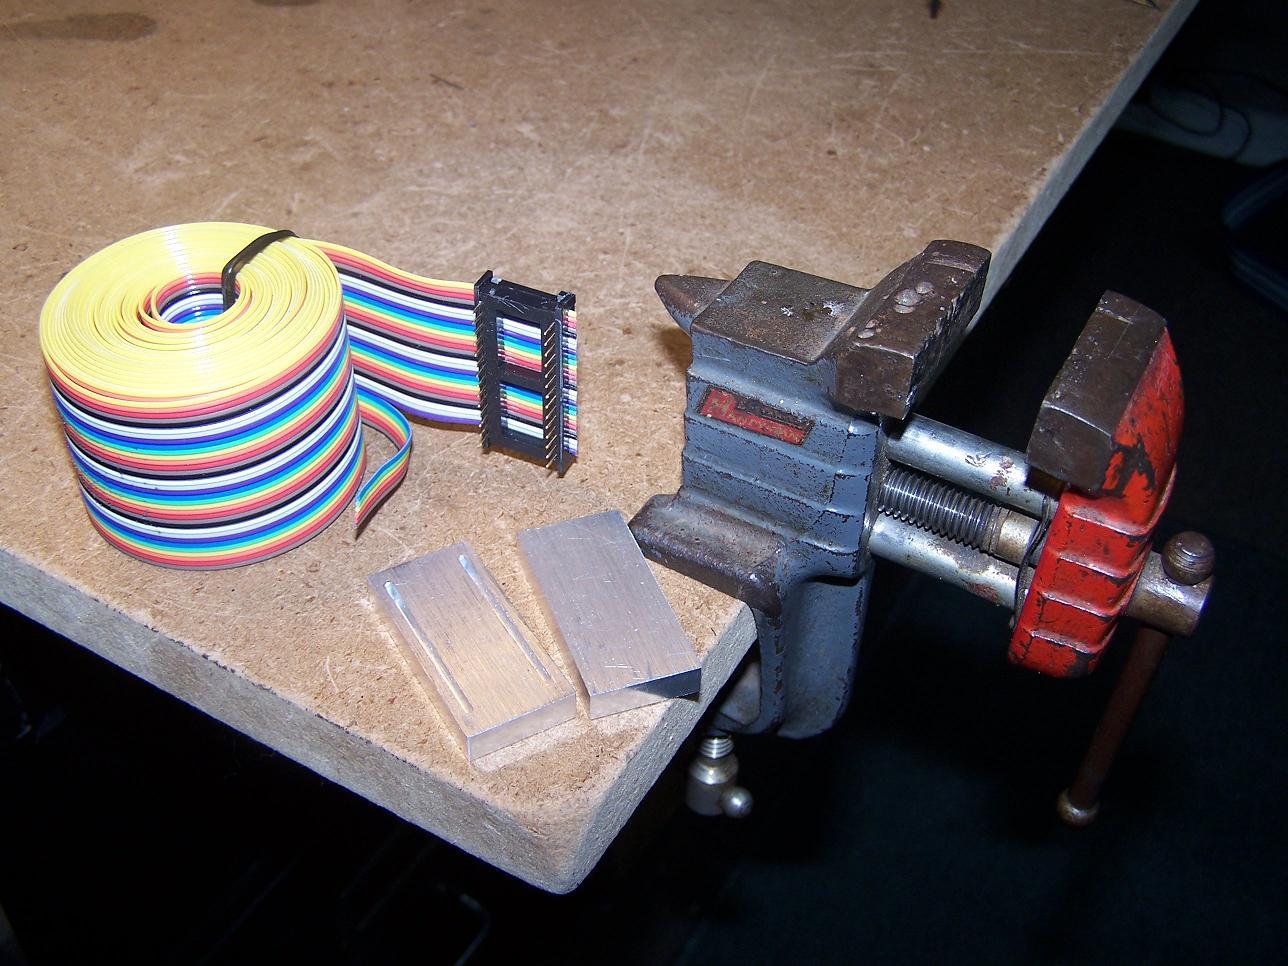
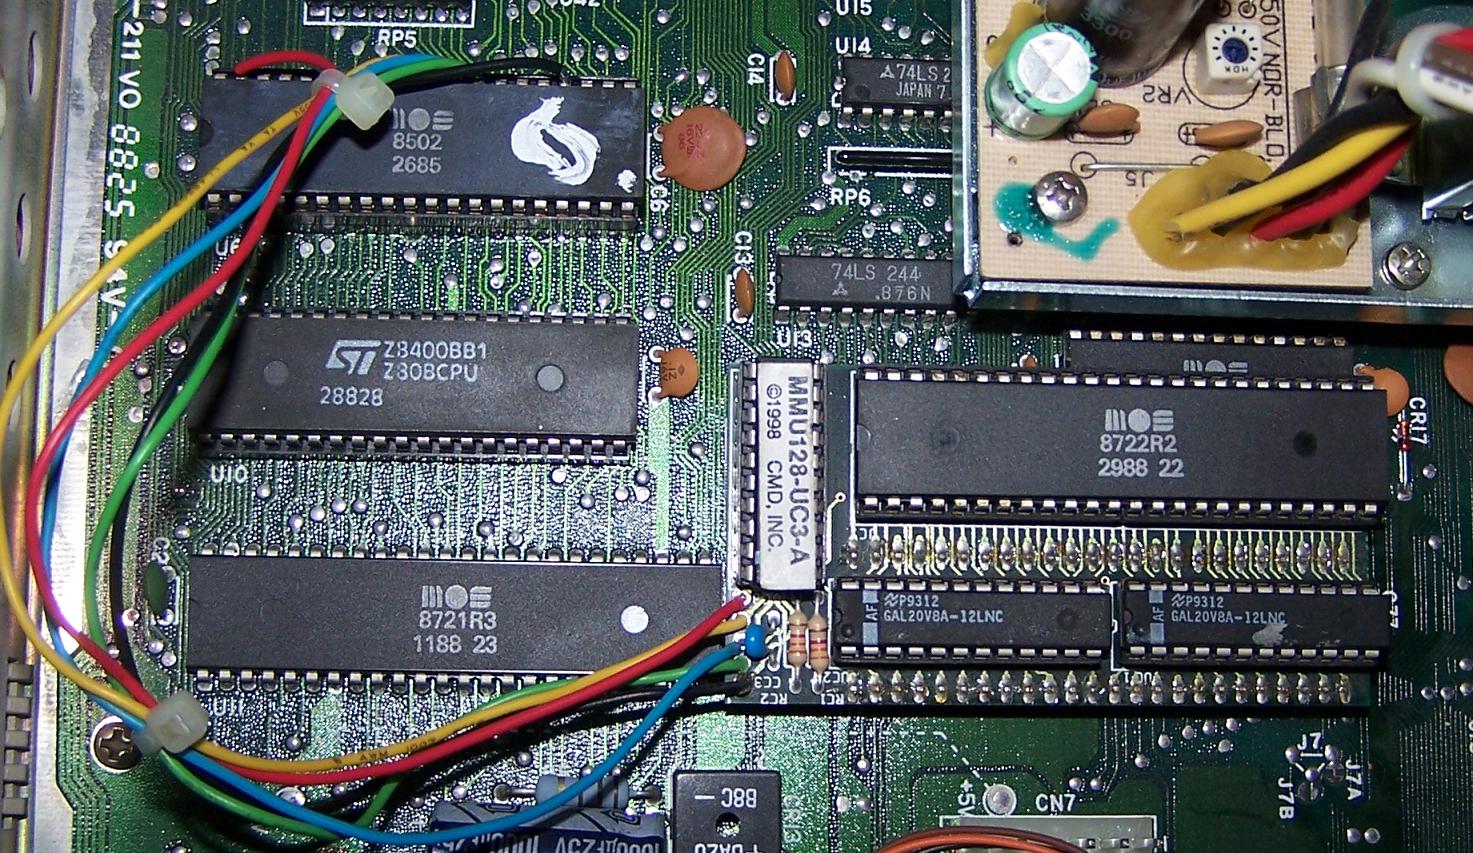
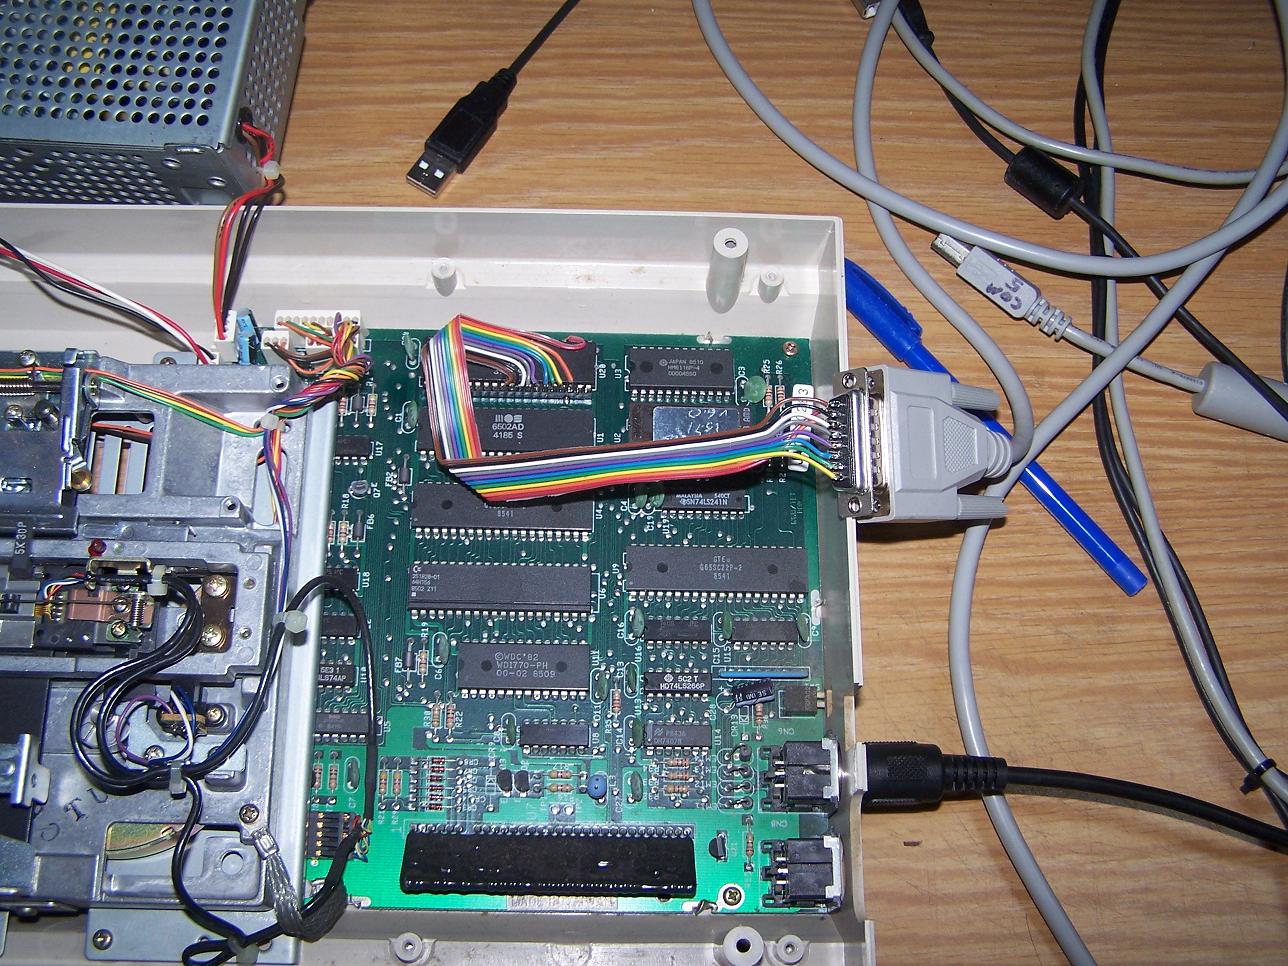
Started playing with a 128D Internal SID Board today. My 128DCR has an MMU board for the SCPU. That board covers the SID so it's not possible to use both boards at the same time, that is until I created an extention cable and a 28 Pin Parallel Socket PCB. The Large 48 Pin socket is for the MMC board. I removed it so you could see how the connector was installed. The Stereo SID board can be purchase Here. I put a pin header on the SID board so that I could unplug it and remove it with out messing with the connecting wires. I soldered the wires to the 8502 CPU for a good solid connection. I also soldered the wires for the MMU board to the CPU as well.
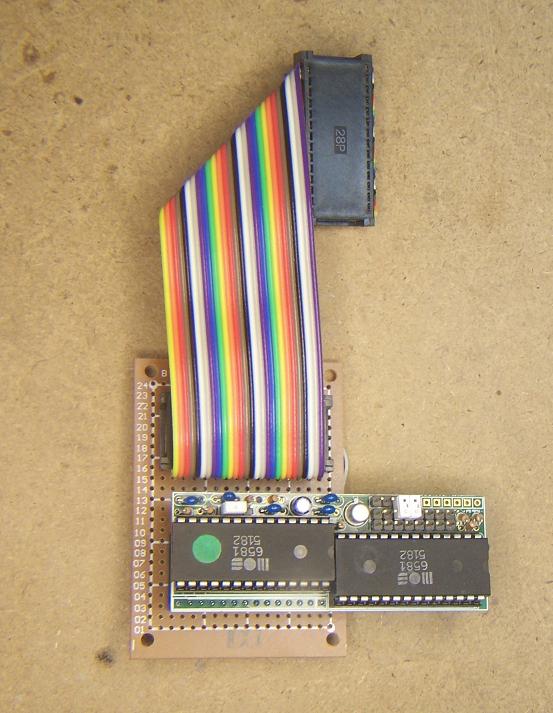

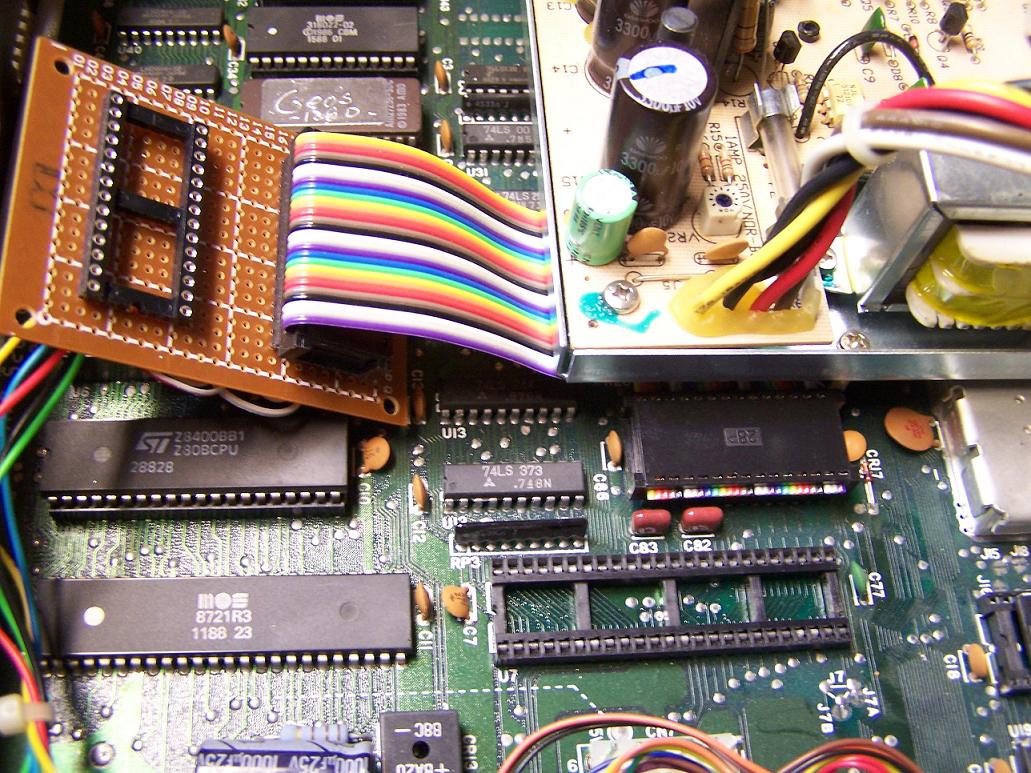
I was testing a 128D Internal SID board for Vanessa lastnight. While I was doing that I looked at the clips from the MMU board for the SCPU. Decided it was time to remove the clips and solder the wires directly to the 8502 CPU. Rather than solder to the CPU that was in the computer already, I dug thru the Extra C= chips I have. I save them all. Found an 8502 I pulled out of a C128 Mobo. Since the legs are solder on them, I cleaned them up the best I could and put the CPU in a socket rather that the socket in the Mobo, This way if there was a problem and I needed to pull the CPU I wouldn't ruin the socket in the DCR Mobo. I have the little card that comes with the SCPU that tells what color wire goes to what pin. I tinned the required legs on the CPU, Cut the clips off the MMU board wires, stripped and tinned the ends of the wires and soldered them to the new CPU. I double triple checked everything before I plugged it all back in. Every thing was correct so I took a deep breath and plugged the CPU and the MMU board back in. Turned the 128DCR back on, Fired right up. Works perfect. I think the clips were not getting a real good connection to the 8502 before. Sometimes when I turned the computer on, I would get these little tiny short lines on the screen for a second or two till the computer started. Now it "POPS" right on, no lines, nothing but SCPU Turbo power...


Was over at Lemon64 today, In a post by "thierry". He posted a link to a bunch of Commodore OSs that I thought I would like to share with every one. I downloaded the file and placed it on my FTP server. It's called "Operating_System.zip" if you want a copy with out going thru Megaupload.
The Message by "thierry"
--------------------------
Hi to all , im upload a Compilation of Operating System of C64 and C128, i think someone is going to be useful..
Contents List
ACE 128-64
Ace16
AceDOS
Asterix
Contiki
CP-M
CS-DOS
DOS 65
GeckOS-A65 V2.0
Geos
LUnix
NT-DOS
ShadOS
Unix 128 v3.11
Wings - Ex CLiPS ---> (JOS) + (CLiPS)
Workbench
>
osT ------------> missing?
SMOS ------------> missing?
BOS 128 ------------> missing proyect?
COMMIX II ------------> missing?
Link Download
http://www.megaupload.com/?d=U7H1S0J6
-------------------------------------------------
Thanks for Sharing the files thierry
Ok, Here it is folks. Pictures of the completed and tested "SID Symphony II Cartridge" by Vanessa. The hacked up case was done by me, crappy job I know. Looks like crap! Thats what I get for trying to work to fast. It was late and I was tired but once I start working on something I hate to stop until it's completed. I had to cut and grind the RCA plug to get it so I didn't have to cut the TOP of the case above the plug, I got it as low to the PCB as I could and still plug the MALE RCA plug in. I also had to grind into the inside of the top cover to allow the cartridge cover to fit properly. I couldn't decide what color LED to use so I installed a 2 Pin Female header so that the LED could be changed out. The LED flashes to the music. YOu can see the LED sticking out of the top of the cover. A picture of the PCB Minus the LED, SID and a couple of other small parts is in the 5/19/2011 entry.
50 - 27C128 (16K) EPROMS Arrived yesterday. I need to remove the stickers and erase all of them. Such fun erasing 50 or more EPROMS in the UV eraser. Most take about 10 to 12 minutes for 6pcs at a time. The EPROMS are for the 1541 Kernel adapters.

21:33 5/22/2011 : Another entry for the day...
Been playing with a Commodore 2002 monitor. The screen is Gray MONO instead of color, The computer, video cable are fine. I checked all the switches on the monitor, they are where there supposed to be. Played with all the dials, nothing happens. I pulled the cover and tapped on connectors etc... nothing happens. Anyone have any idea what could be wrong? The picture is nice and clear on it. I would like to fix this monitor.
Awhile back I purchased a bunch of 27C020 - 2MB EPROMS from DLH. Just got around to erasing them today to start programming them for 64NIC game ROMS. Each EPROM has 16 games on it. I have 2 collections that I program on them and sell with the 16 position hex switch that is needed to use these on the 64NIC. A list #1 and list #2.
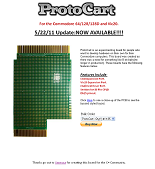
Found out about this new replacement board for the 8 Bit Baby, from what I was told, the 8 Bit Baby is no longer being produced. check out the site. Click on the picture below to goto the the site.
Started working on my SID Symphony II cartridge that was created by Vanessa. I'm about 80% done at this point. A few small things to add. I ordered a bunch of 1/8 watt resistors, I forgot to order 2.2k resistors. Grrrrrrrrrrrrr. Now it will look ugly with a 1/4 Watt resistor in it.
I asked around to find out how to make the Ramlink show up under WHEELS, Thanks Jbevren for pointing me in the right direction to at least where to start. Here is how it's done, Step by step..
1. Load up Wheels.
2. Click on A:WHEELS MASTER Icon.
3. In the window that opens, look for "Toolbox 128" and click it.
4. I already have an A,B and C drive so MINE will be D: drive. steps are the same for any drive letter. Click the next open drive letter.
5. When the window opens, Click on "Install Drive"
6. A window will open that says "Turn the desired drive on.", Click OK
7. In the window on my computer in the window I see "16 RL/RD", Highlight the drive you want and click on "Open". 16 is my RL Device #.
8. The next window that opens show the info for the Ramlink, to the right, there are buttons for "Remove Drive", Format Disk", "Validate Disk" and "Change Partition", I clicked on "Change Partition".
9. I have a 1581 Partiton for GEOS 128 v2.0 and a Native partiton, I want to access the Native partition, so I double cliked on that. You can go back and change the partitions if you want to access a different one at a later time.
10. The window that showed up in Step 8 is again displayed with the NEW info for the selected partition. Click "Save"
11. Now my Drive "D" shows the Ramlink-Native Partition.
12. At top of the screen, click on the "options" tab, select "save all" to save the settings
13. Click the "wheels" Tab at the top left and select "quit"
14. The "Toolbox 128" program exits and reloads the desktop. IF you did everything correctly, you will see a "D" drive with the name you gave the Native Partition, Mine is called "RAMLINK-NATIVE" That shows next to "D". "D:RAMLINK-NATIVE"
15. Use the partition like any other drive.
Hope this information helps you out.
More good info:
Vanessa has created some more great hardware, A Stereo SID Cartridge, a 128D Stereo SID board and a 128 Stereo SID Board. More info, pics etc... can be found HERE. All boards have been built and tested so have no fear of having them produced. Great job Vanessa. Another great batch of hardware for the C= Community. Thank you for your efforts.
I assembled 11 adapters today. 6 of them have been SOLD already (3 - 64's and 3 - 1541's). Here is what they look like.
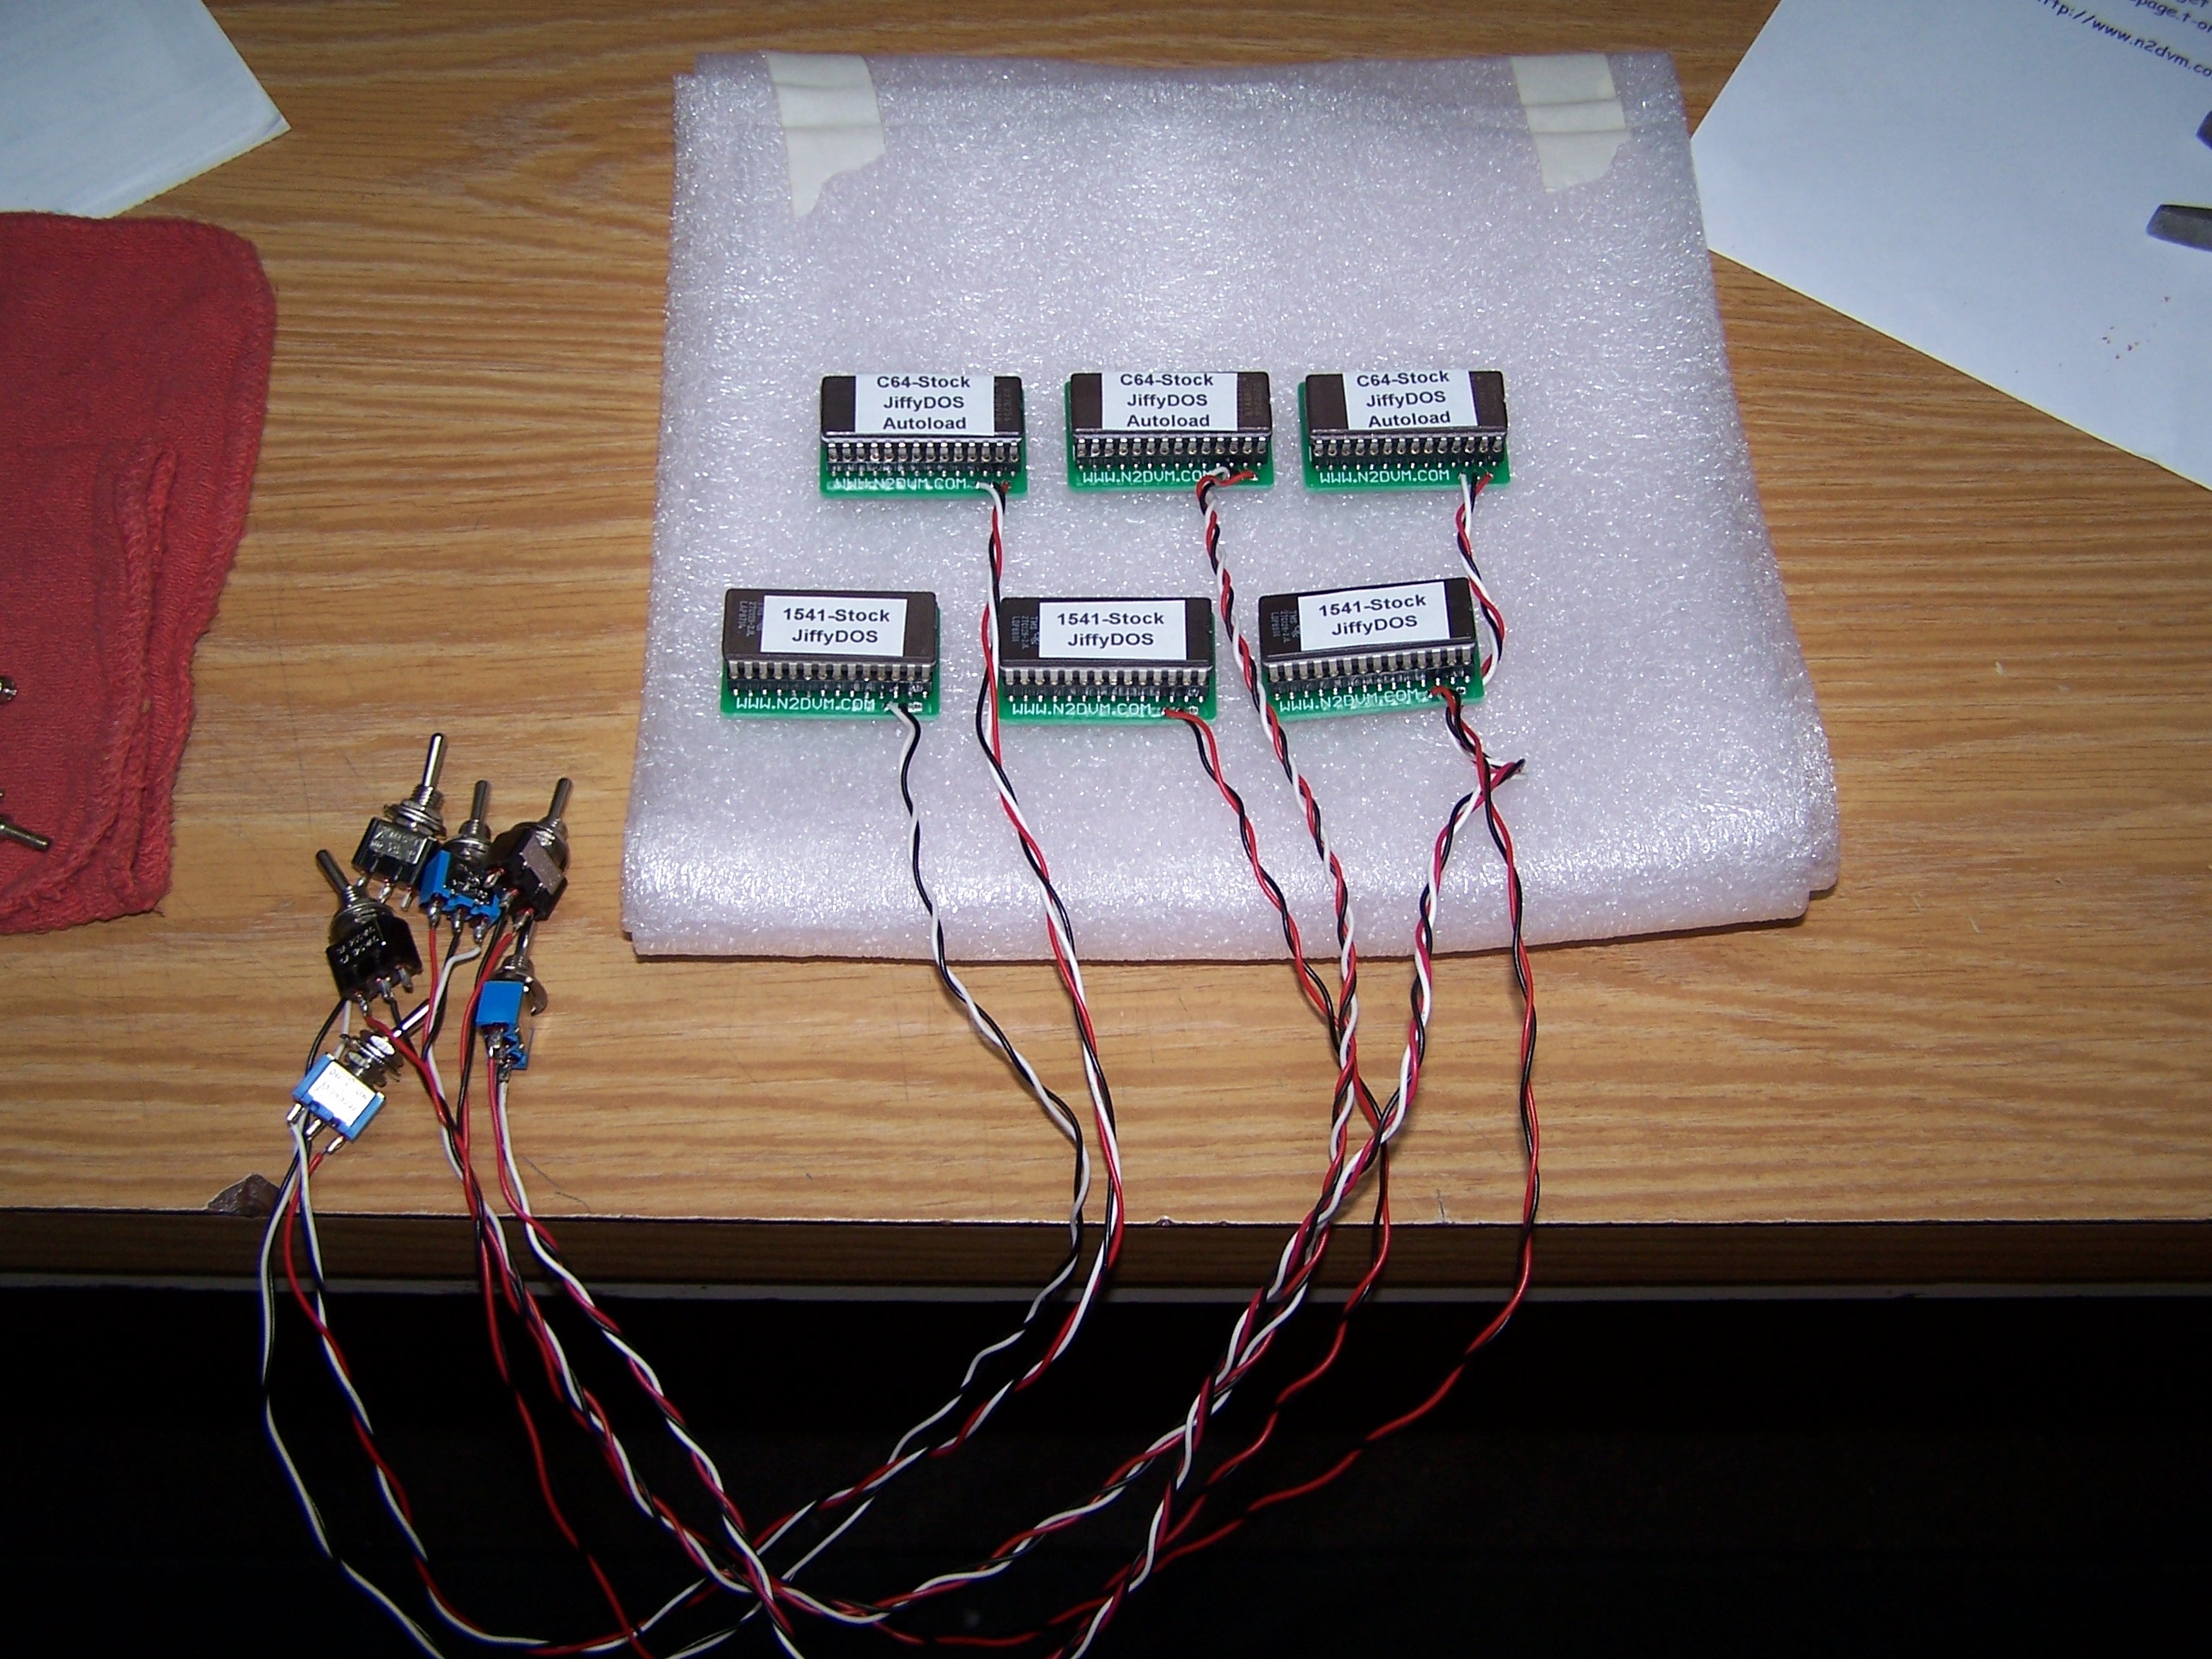
The C64 Kernel boards arrived today, I assembled two and tested them in the C64 and a 1541, Works PERFECT! I will be selling them for $20 each Plus shipping, the shipping for the US is $5.20 - Priority Mail® Small Flat Rate Box. I also have ones for the 64C, they are the same price. If you would like to order any, please Click on the "Android" at the top of the page to send me an email with what you would like and then we can work out the details from there. The C64 adapter has the STOCK/JiffyDOS and Autoboot kernels in them and the 1541 adapter has STOCK and JiffyDos. JiffyDOS is purchased from Jim Brain for EACH adapter sold so every one is a Legally Purchased Copy.
Just got done installing the Megapatch 3 on my GEOS 128 v2.0 system. Oh what fun that was trying to get the file 128mp3de.g98 uncompressed. Special thanks to Werner Weicht for the file GeoConvert98.D64 This is the program needed to extract the Megapatch file from it's g98 compressed state. The first problem was HOW to get it to a disk. I used the Zoomfloppy to try and copy it to a 1541 disk, NOPE, Didn't work for some reason or other then I decided to try the good old DirMaster program. I created a blank D81 image, Imported the Megapatch file into the image, saved it then used 1581disk.exe to write the D81 to a 1581 disk. Went over to the 128DCR with GEOS 128 v2.0 already loaded up, copied the extracted geoconvert98 program to the 1581 disk and ran it and extracted the 128mp3de.g98 file to the same disk, it overwrites the g98 file so now it will show up and a GEOS file with ICON. I installed the Megapatch to my Ramlink because I'm using a 1571 in 41 mode so there wasn't enough room on the disk to extract it there. By the looks of it, you have to manually start the Megapatch if you want to use it. Clicked on the icon "GEOS128.MP3". It seems that you have to click on this program to start Megapatch.
If I have anything to add about the Megapatch, I'll post it here on the BLOG. Figured I would at least get some information out there. MOST People don't even know about the Megapatch files so I'm glad to bring it to peoples attention. As always, I've provided links to the exact same files I used. Have fun and if you learn anything from these files, please let me know my clicking on the "Android" at the top of the page and send me an e-mail.
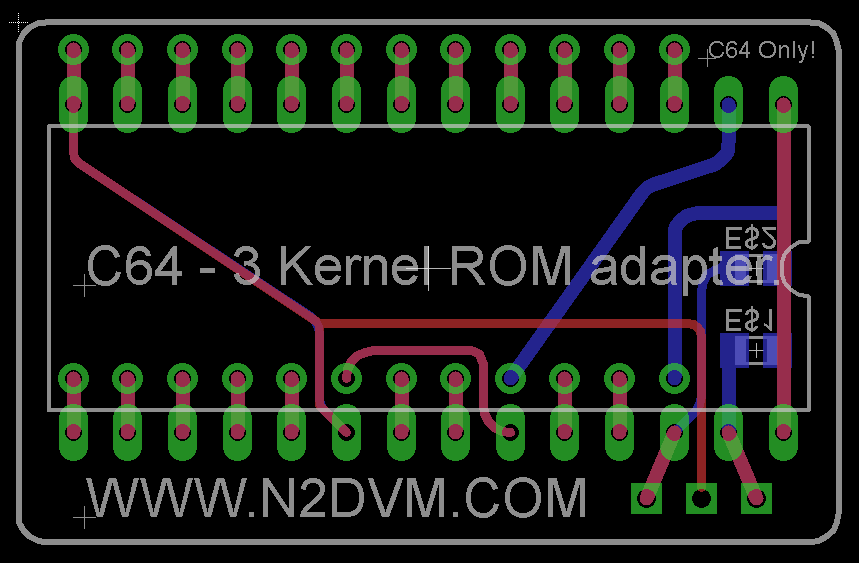
It's Done, I just ordered 100 - C64 3 Kernel ROM adapter boards and EPROMS. This board looks much better than the other ones I've done at least I think so. Had to double triple check all my hole sizes, the 64C boards, some of the holes had to be cleaned out before I could get the pin headers in them, this time the holes are larger so I won't have to worry about that. will be around 3 weeks before the boards arrive Below is a pic of the new boards, click on the pic for a larger version.
I still have some of the 64C Kernel boards for sale also. $20 + Shipping. Click on the "Android" at the top of the page to send me an E-Mail.
A week or so ago I ordered some voltage regulators to fix a couple C128 PSU's that were dead, I did get one working at this time, Q1 C3568 was the part number, at the emitter it showed Zero volts, Now I have 5.03 volts. The AC side was just fine, no problems there. The 2nd PSU is showing 3.5 volts at the Q1 emitter, not sure why this is at the moment, there is another transistor, Q2 that I ordered some replacements, 2SA934's I don't really understand what it does BUT it's the next in line from Q1. Seems like the same problem with a 1764 REU PSU. I'll have to wait till my other parts come it to finish working on the last 2 PSU's.
Really haven't been working on anything new, I have a couple things I want to get made PCB wise but no money at this time to get them made. Overtime at work has been dead which sucks.
One thing I was playing with was a non-working C128 Mobo. Pulled all the socketed chips and replaced with know good ones, still not working. I started poking around the board with an Oscilloscope, a Tektronix 310A. I'm new to using an O' Scope, took me a bit to get it when I got any readings that Looked like they showed in the SAMS C128 Photofacts. Thanks to DLH for scanning them in. Replaced a bunch of the larger chips w/sockets and tested good IC's, still not working at this time...
Started working on getting GEOS working with the SCPU, it works fine in 1Mhz mode but if you switch it to Turbo mode, GEOS locks up. The SCPU comes with a floppy that has a program called "SuperInstall" I double clicked that and a menu comes up letting you know what it's going to do, just follow the menus and in no time you'll have GEOS 128 v2.0 running at 20mhz. WOW What a difference!! I'm hooked, I loaded geoWrite to the Ramlink and double clicked it, in mere seconds it was up and ready for me to type some drivel into it.
I hurried home from work so I could get started installing Metal Dust BUT first I had to try the game out. I just loaded it from the disks, took a little time to load but let me tell you, once it was loaded, it was KILLER, so smooth and a little difficult to play. The game is so smooth, sure not used to games playing like this on the C=. One of the Menu selections when the game starts is HOW you want to load it, From Disk,HD Ramlink Etc.. I have a Ramlink so I killed the game and copied the disks to a native partition on the Ramlink with fcopy+ from CMD. When I started the game back up from the Ramlink, it took almost no time to load the game, maybe 15 to 20 seconds and I was playing again. AWESOME!
Went to the mailbox today, what did I find there? Of course it was the Ultimate in Commodore goodness, a SCPU-128 w/MMU board from Al Anger. Thanks for giving it a NEW home at my place, you know it will be used and taken care of. :) I pulled the cover off the 128DCR, took a deep breath and removed the MMU (8722R2 40 PIN IC) IC, that took some effort to remove from the socket, It was like pulling a tooth but this one has 40 legs. After taking a deep breath and pulling the IC, I sat down at my desk and gently put the IC into the SCPU MMU board. This board is needed to use the SCPU in 128 Mode. I use GEOS 128 v2.0 in 128 mode and 80 column so it will be used for sure. Next I plugged the MMU board into the DCR. I wanted to put a Stereo SID board in the DCR but now the MMU board sits OVER TOP of the SID so that cancels that idea. There are five wires with clips on them that go to pins on the CPU, Al gave me the book/disk and all the info I needed to install the SCPU with out trouble. After looking over where the pins I needed were located and deciding in which order was the easiest, I started "clipping". After that was all done, I sat down to admire my handy work and double check EVERYTHING before I plugged the power cord back into the DCR AND made SURE the power switch was off before I did. Talk about nervous, in my mind all I could see was SMOKE pouring out of the DCR & SCPU and Al coming to NY to kill me for letting the magic smoke out but all was well when power was applied. Next up is to get the game Metal Dust going.
Ok, Been awhile since I did any updates here. I am currently working on an Extra ROM socket adapter for the 128's, I use GEOS and play with an assembler that Radrick gave me, With this adapter, I'll be able to put BOTH of these binaries into an EPROM and select them at startup with the flip of a switch. I am also making it so that with another switch, you can Shut the adapter completly OFF and so to speak Remove it from the system so there is no KEYS that need to be press etc and Startup to bypass the ROMS.
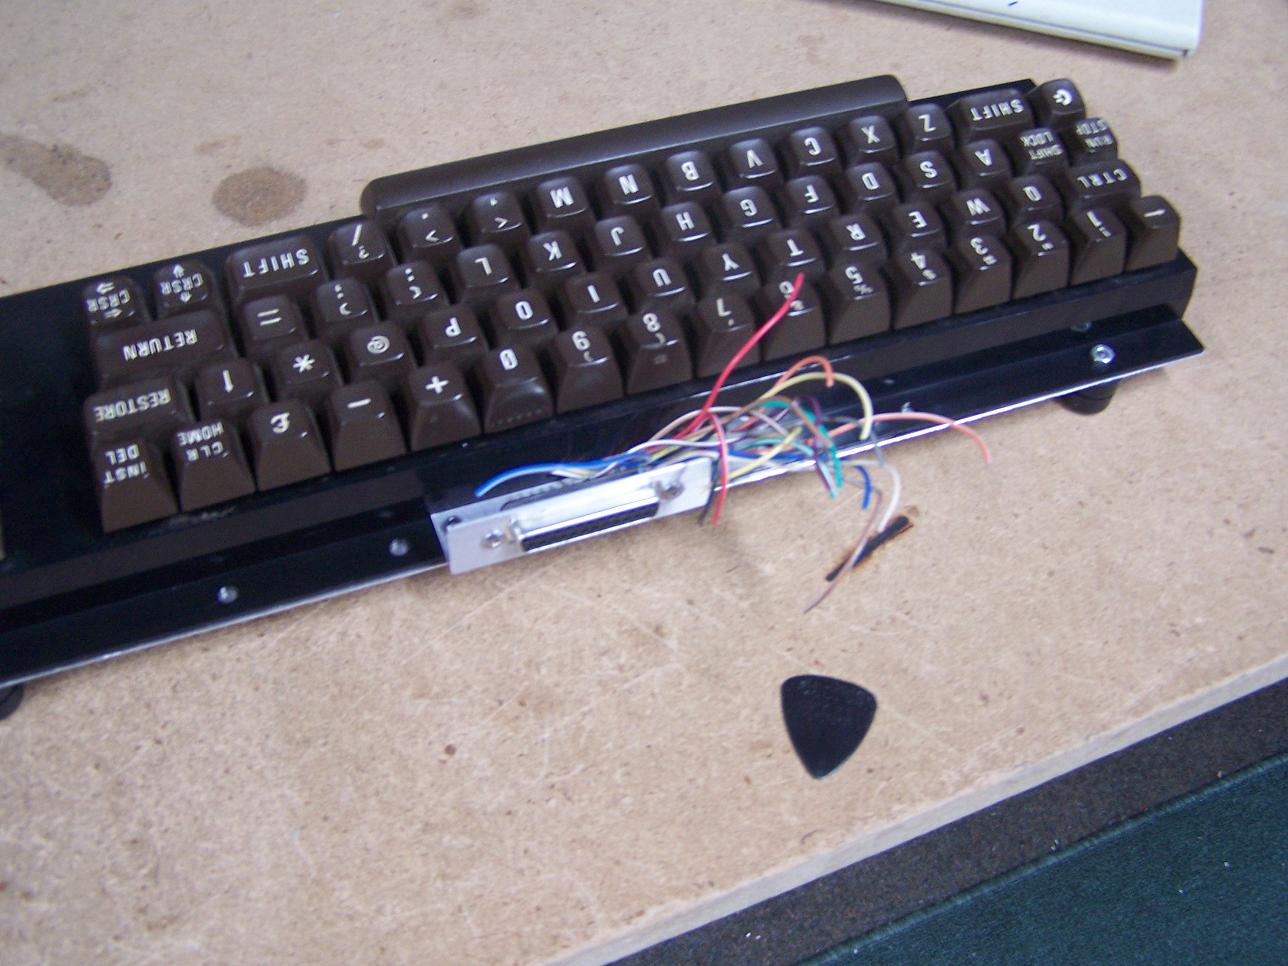
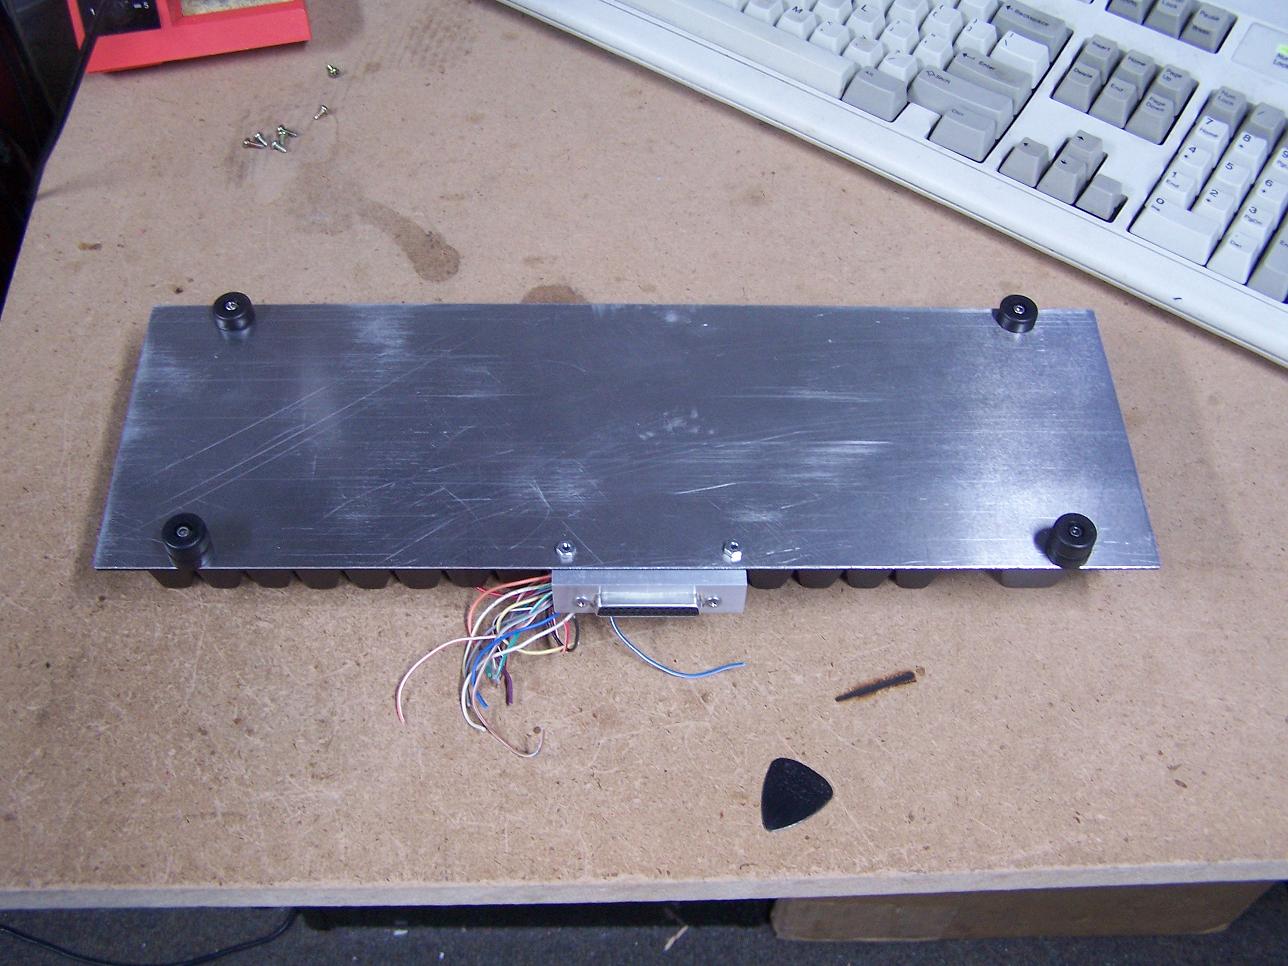
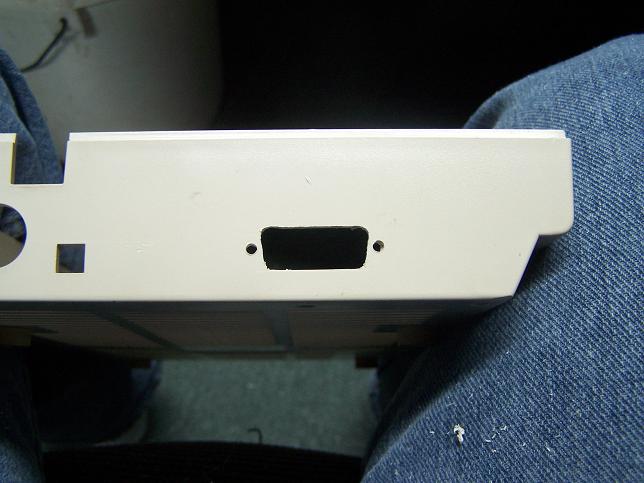
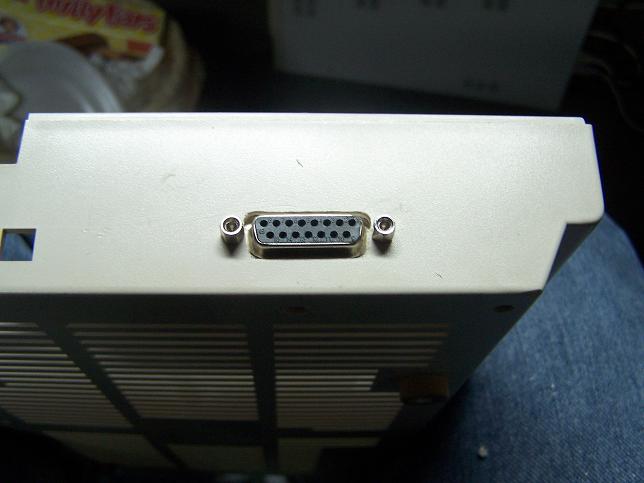
The other thing is a 64 Keyboard that will use a DB25 connector and a ribbon cable to hook to the 64. At this point, It will be mainly for use when I'm tinkering and need the keyboard out of the way. The short cable on the stock keyboard is a little to short for my liking. I'll take some good pictures and post them in the entry at a later time. For now check these 1 - 2 - 3
Had a 1702 Monitor DIE on me today. The Test Bench Monitor. Get done taking a shower, go back down to my dungeon and I hear this arching noise and a funny electric smell, at first I think it's my furnace, I have an fuel oil burning furnace with a highvoltage transformer in it, then I notice the nice Electric BLUE light coming from the back of the monitor. Time to get another C= color monitor. I've had that 1702 for 3+ yrs, it's had a good life.
Decided it was time to play with the Zoomfloppy tonight. I did the parallel port mod on a 1571. I just soldered the wires to the 6526A IC. The info how to wire up the DB15 connector is at the bottom of the page. After a little trouble with opencbm, I had an old copy installed and the DLL files are NOT over written in the C:\Windows\System32 directory, Thanks to "THEWIZ" for the help. I had an old version of opencbm installed that I forgot about. The version for the ZF is Here. Also grab gui4cbm4win 0.4.2. Also see Nate Lawson's page for other info.

Ordered a Zooomfloppy from www.jbrain.net. It replaces the X?1541 parallel transfer devices. Parallel ports are getting hard to find on modern PCs. This uses the USB port instead. Click the link to Jims site to find out more. Expected ship date is Jan 13th.